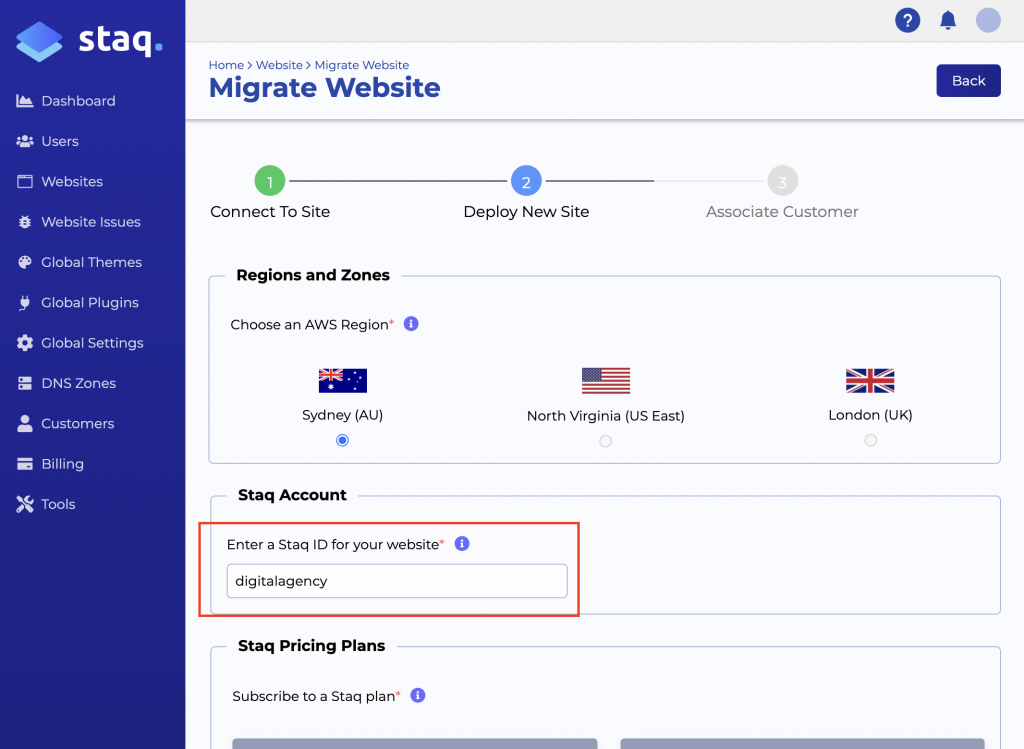
After completing all the steps above, it's now time to set an internal ID name of the website inside your Staq account. We recommend that you put the business name as the Staq ID name:
OPTIONAL: if you manage multiple websites i.e. a developer or agency, below, you'll see the agency plans that you've set up (if you've already done this). You'll then assign a plan to them.
Otherwise, this section will be blank if it hasn't been set up.
Click Next.
OPTIONAL: You can create a customer which will then assign the website plan in the previous screen to a customer.
Otherwise, click Deploy:

After a moment, the page should redirect to the website table. From there, you can search for your ID name to see the status of it by hovering over the State column:
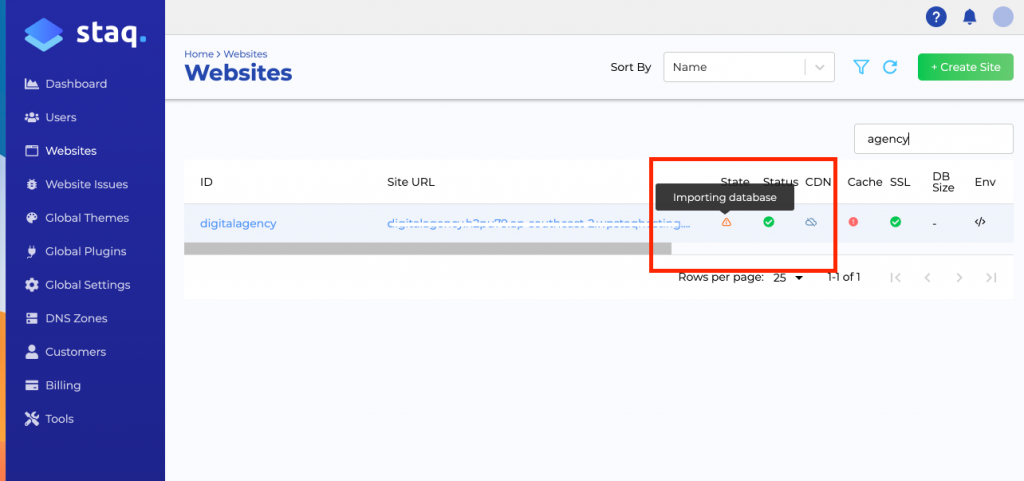
Once it is done, the Status should say Available.
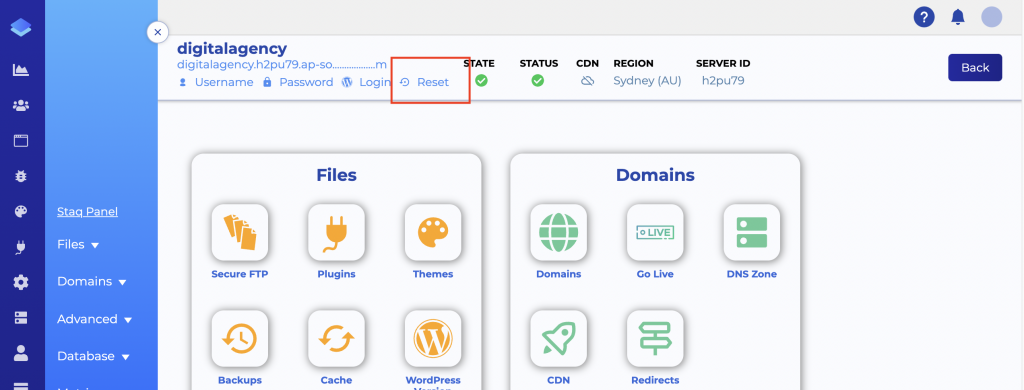
To log into the WordPress website, click ID in the website table to be taken to Staq Panel. From there, click Reset to reset the password so you can access it via the Staq password manager function: