Core Web Vitals Optimization Guide
The guide to improving your Google Core Web Vitals score.
Do you prefer to watch a video tutorial instead?
Checkout our Core Web Vital optimization videos instead.
Otherwise, see the text information below.
Improve your Google PageSpeed Insights score in a nick of time. Staq's tool will take care of the rest. The tool is accessible inside your Staq hosted WordPress website.
Preparation
The best browser to use to perform testing and review is Google Chrome.
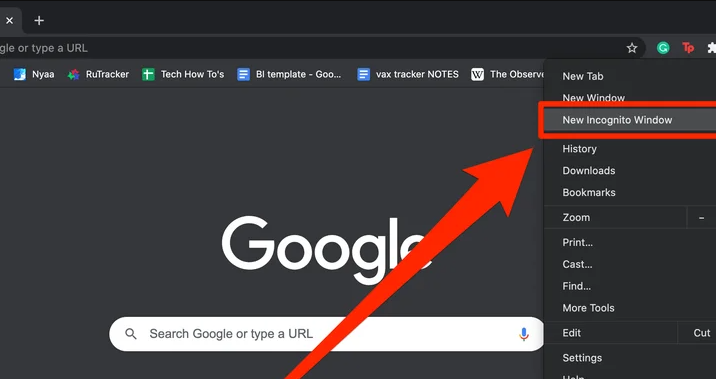
Open Chrome in Incognito mode:
With your mouse or keypad, right-click on the page inside Chrome and click Inspect
Then, click the Network tab and then click Disable cache:
Since our tool exclusively works within the Staq environment, the plugin and tools are exclusively available when the website has either been installed or migrated across to Staq.
If you have an existing WordPress site and it isn't on Staq, please follow the instructions here to migrate your site across to Staq.
Under the existing website in your Staq account or the recently migrated website, go to the Plugins page and disable the following plugins:
- Caching
- Optimization & Minification
- Image compression & WebP generation
- CDN
Popular plugins (but not limited to) that fall under this category are:
Caching
- WP Rocket
- W3 Total Cache
- WP Super Cache
- WP Fastest Cache
Optimization & Minification
- Autoptimize
- Hummingbird
- FlyingScript
- NitroPack
Image Compression & WebP generation
- ShortPixel
- Smush
- Imagify
CDN
- Cloudflare
- BunnyCDN
- MaxCDN
- Sucuri CDN
- StackPath
- KeyCDN
Once you confirm every single form of optimization plugin has been disabled, please proceed to the next step.
Let the PageSpeed Insights tool perform a true assessment of your website by clicking this link. Enter the website URL and let the tool run its course.
Automatically being on Staq means text compression and an efficient caching policy on static assets within the root domain are enabled.
It is recommended that you take a screenshot of both Mobile and Desktop scores along with the opportunities that Google recommends that you follow.
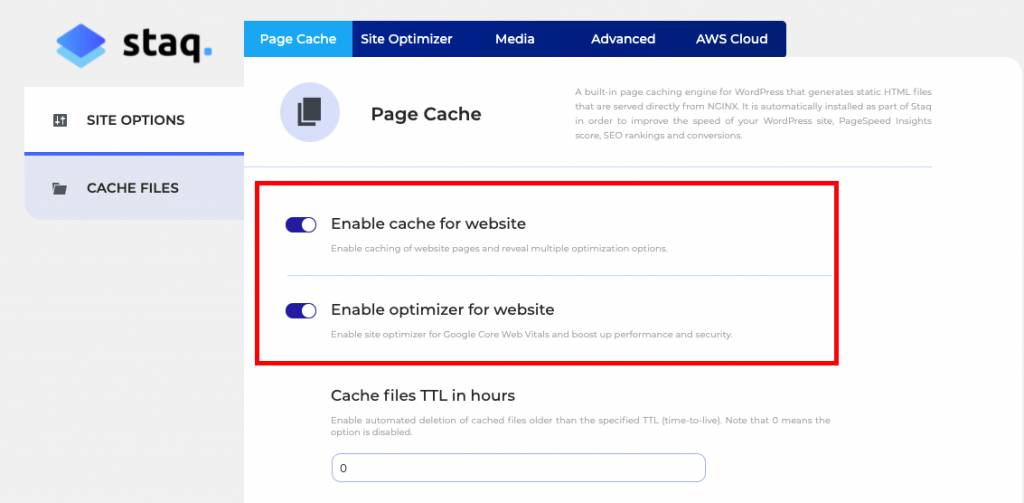
Log into the WordPress site accessible via your Staq account and then click Staq Hosting and then click:
- Enable cache for website; and then
- Enable optimizer for website.
1-click optimization opportunities
Both .CSS and .JS files can cause render-blocking issues, however, you may find that Google identifies purely .CSS files only.
The Staq tool may either eliminate render-blocking resources or improve them.
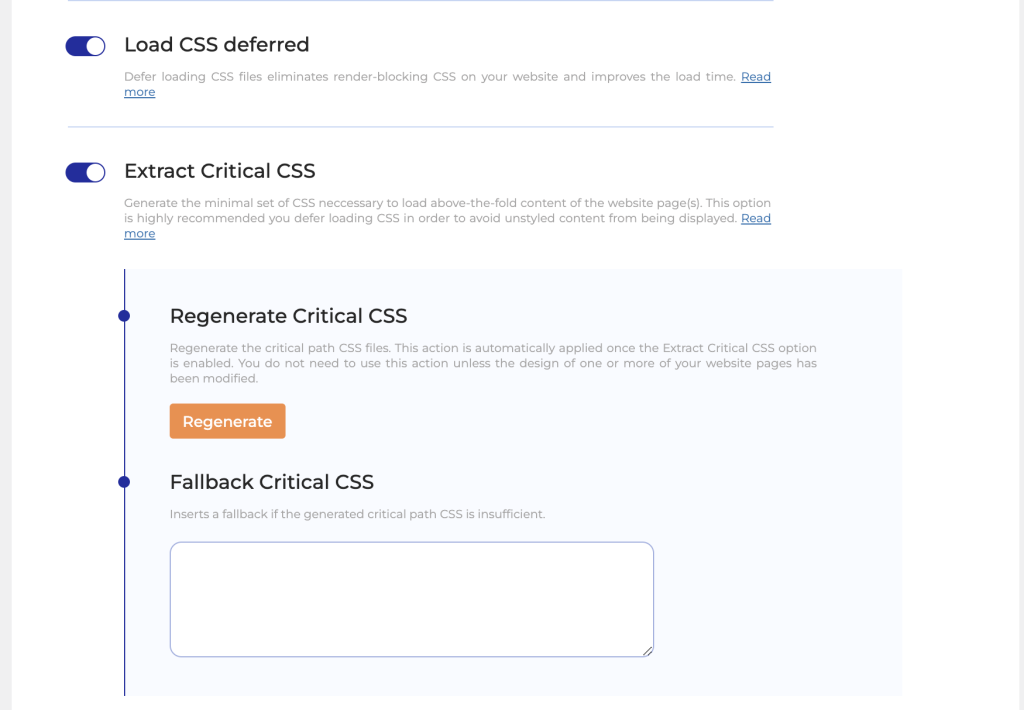
To optimize, go to Site Optimizer > CSS. Then turn on:
- Load CSS deferred
- Extract Critical CSS.
What this will do is find all the critical CSS that loads the website above the fold and add it as an inline CSS at the top of the HTML file. Then, it defers the rest of the CSS files that aren't required at the initial load.
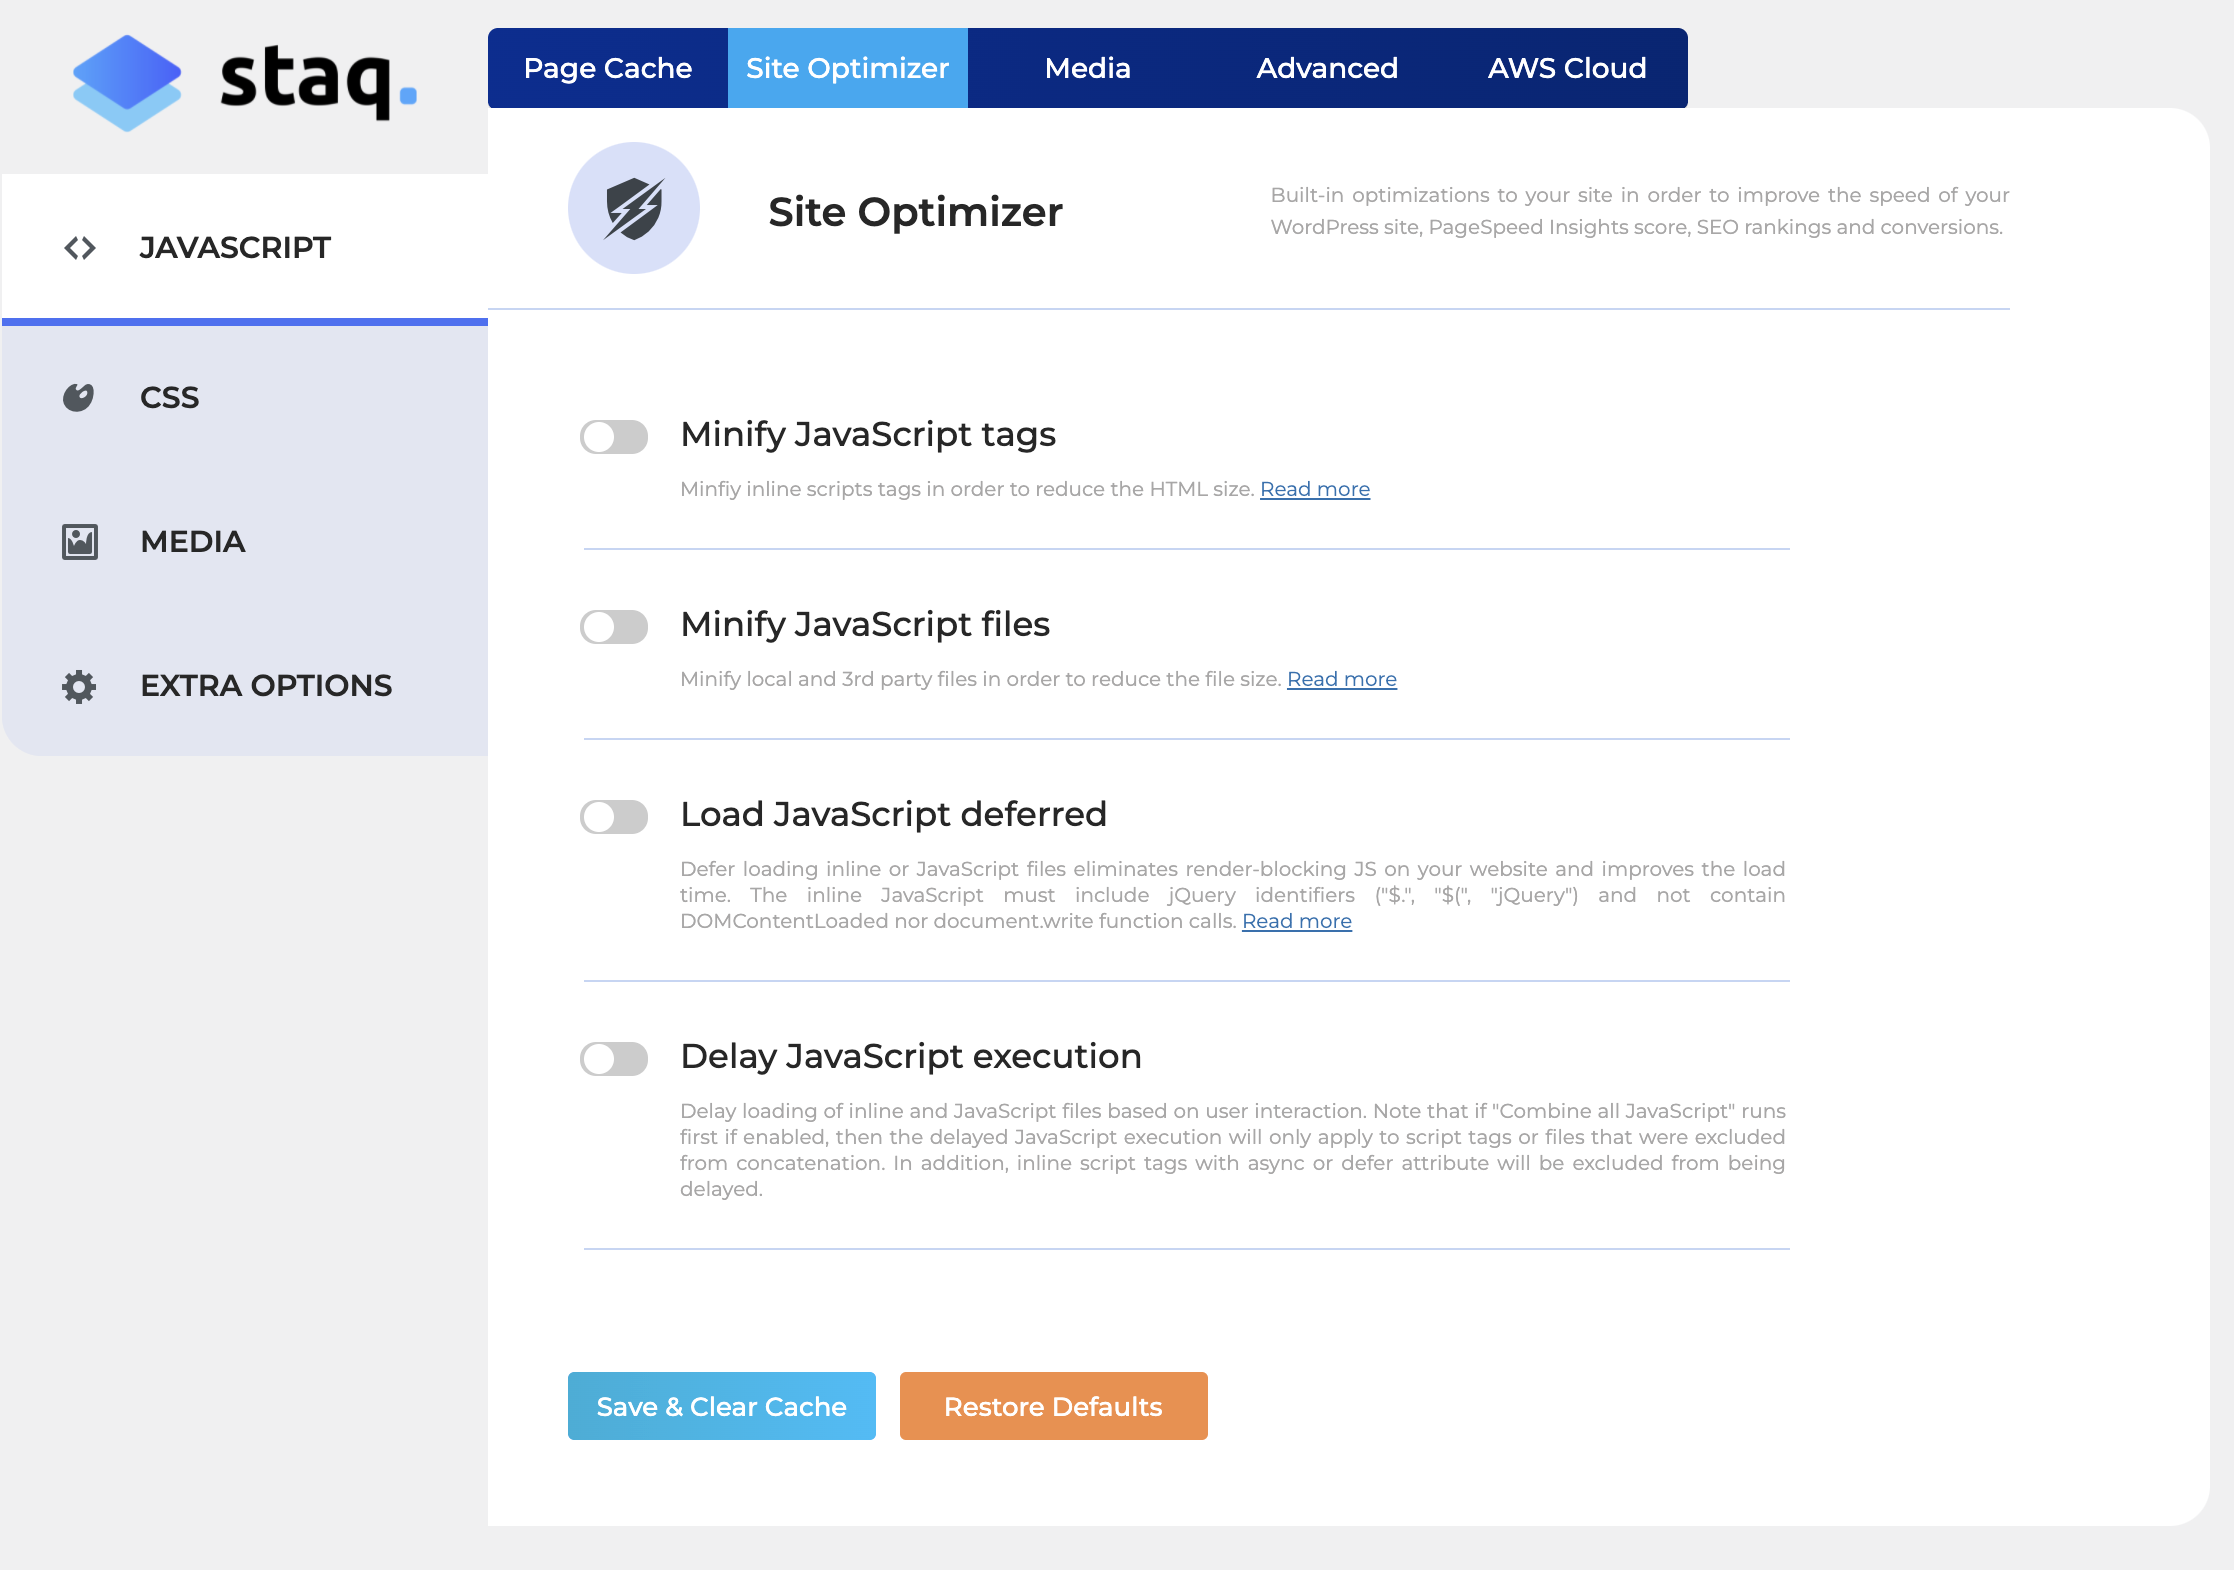
There are JS files that don't need to load on the initial load. So go to Javascript and select Delay JavaScript execution.
Please note that Staq applies conservative measures here. It does not delay:
- core WordPress JS files
- scripts and files that contain .min. and jQuery
If you wish to aggressively improve your PageSpeed Insights score, please scroll further down to JAVASCRIPT OPTIMIZATION GUIDE to view our advanced tutorial on how to optimize JavaScript files and scripts further.
This recommendation means to defer all images upon initial load and download the image as the user scrolls down the webpage.
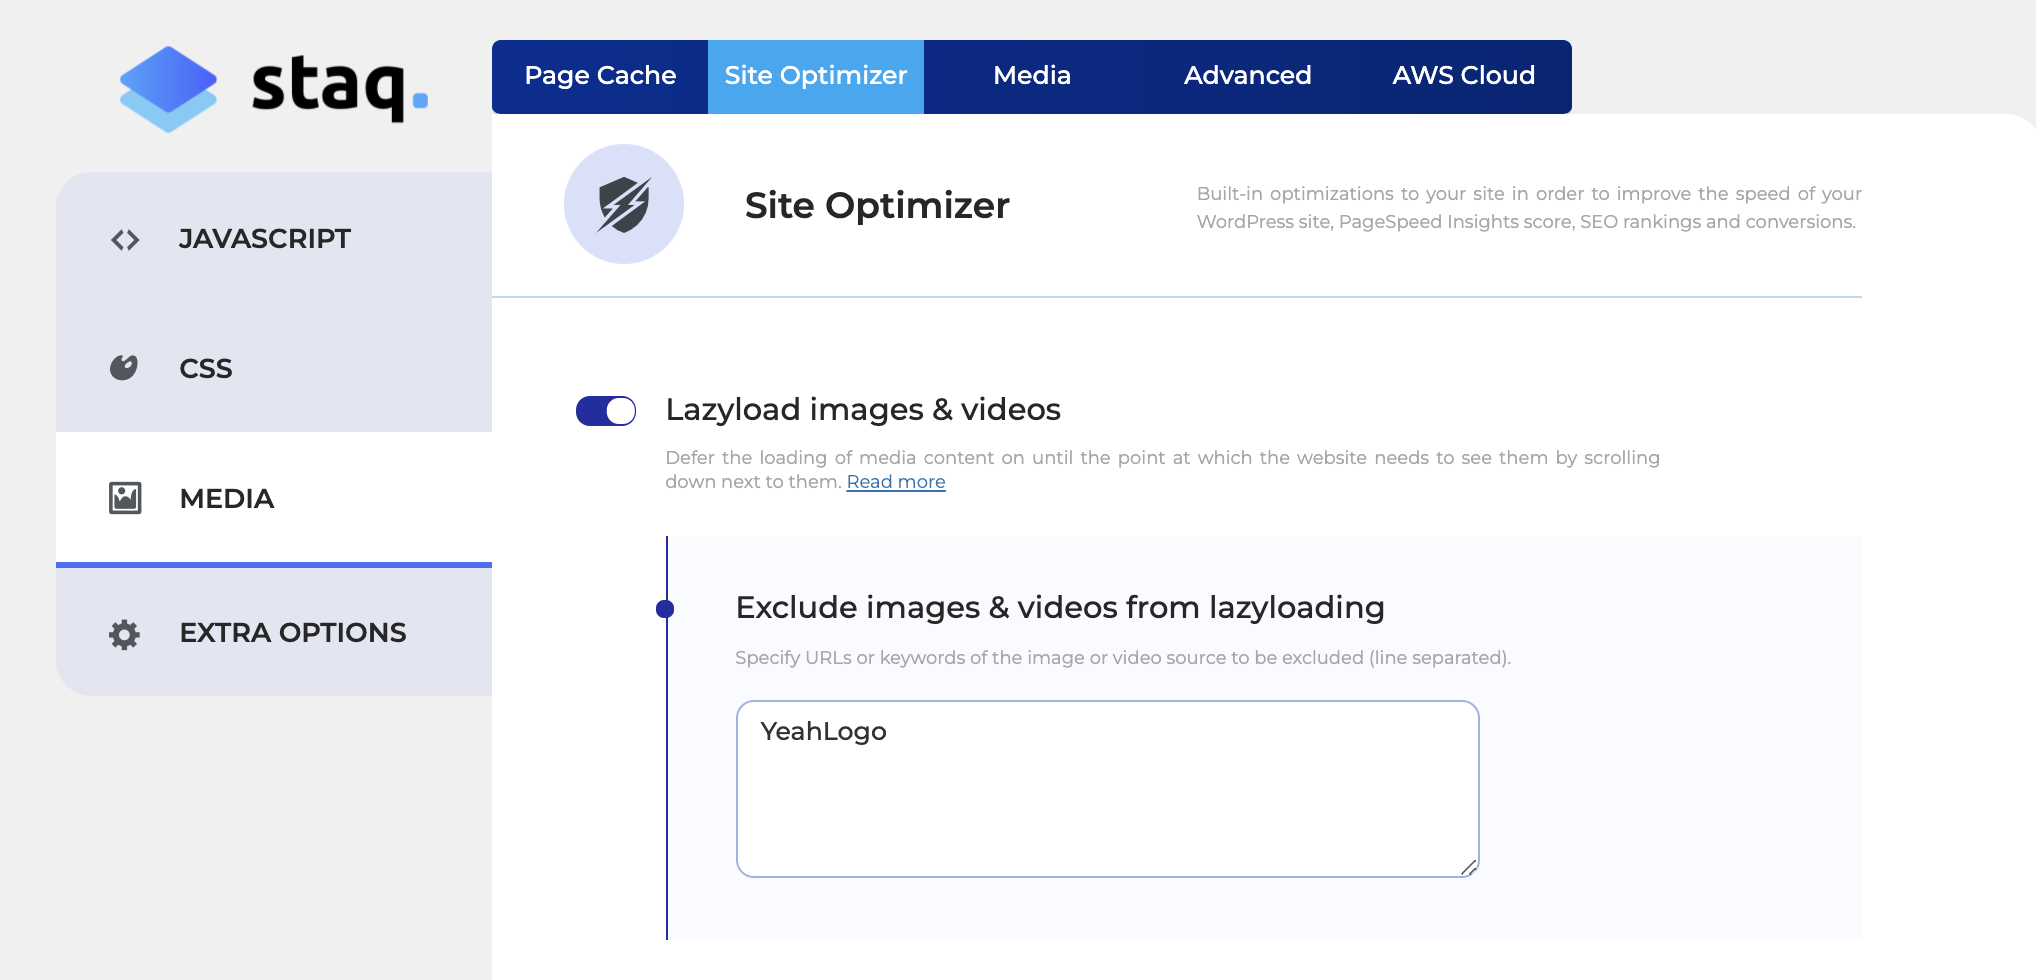
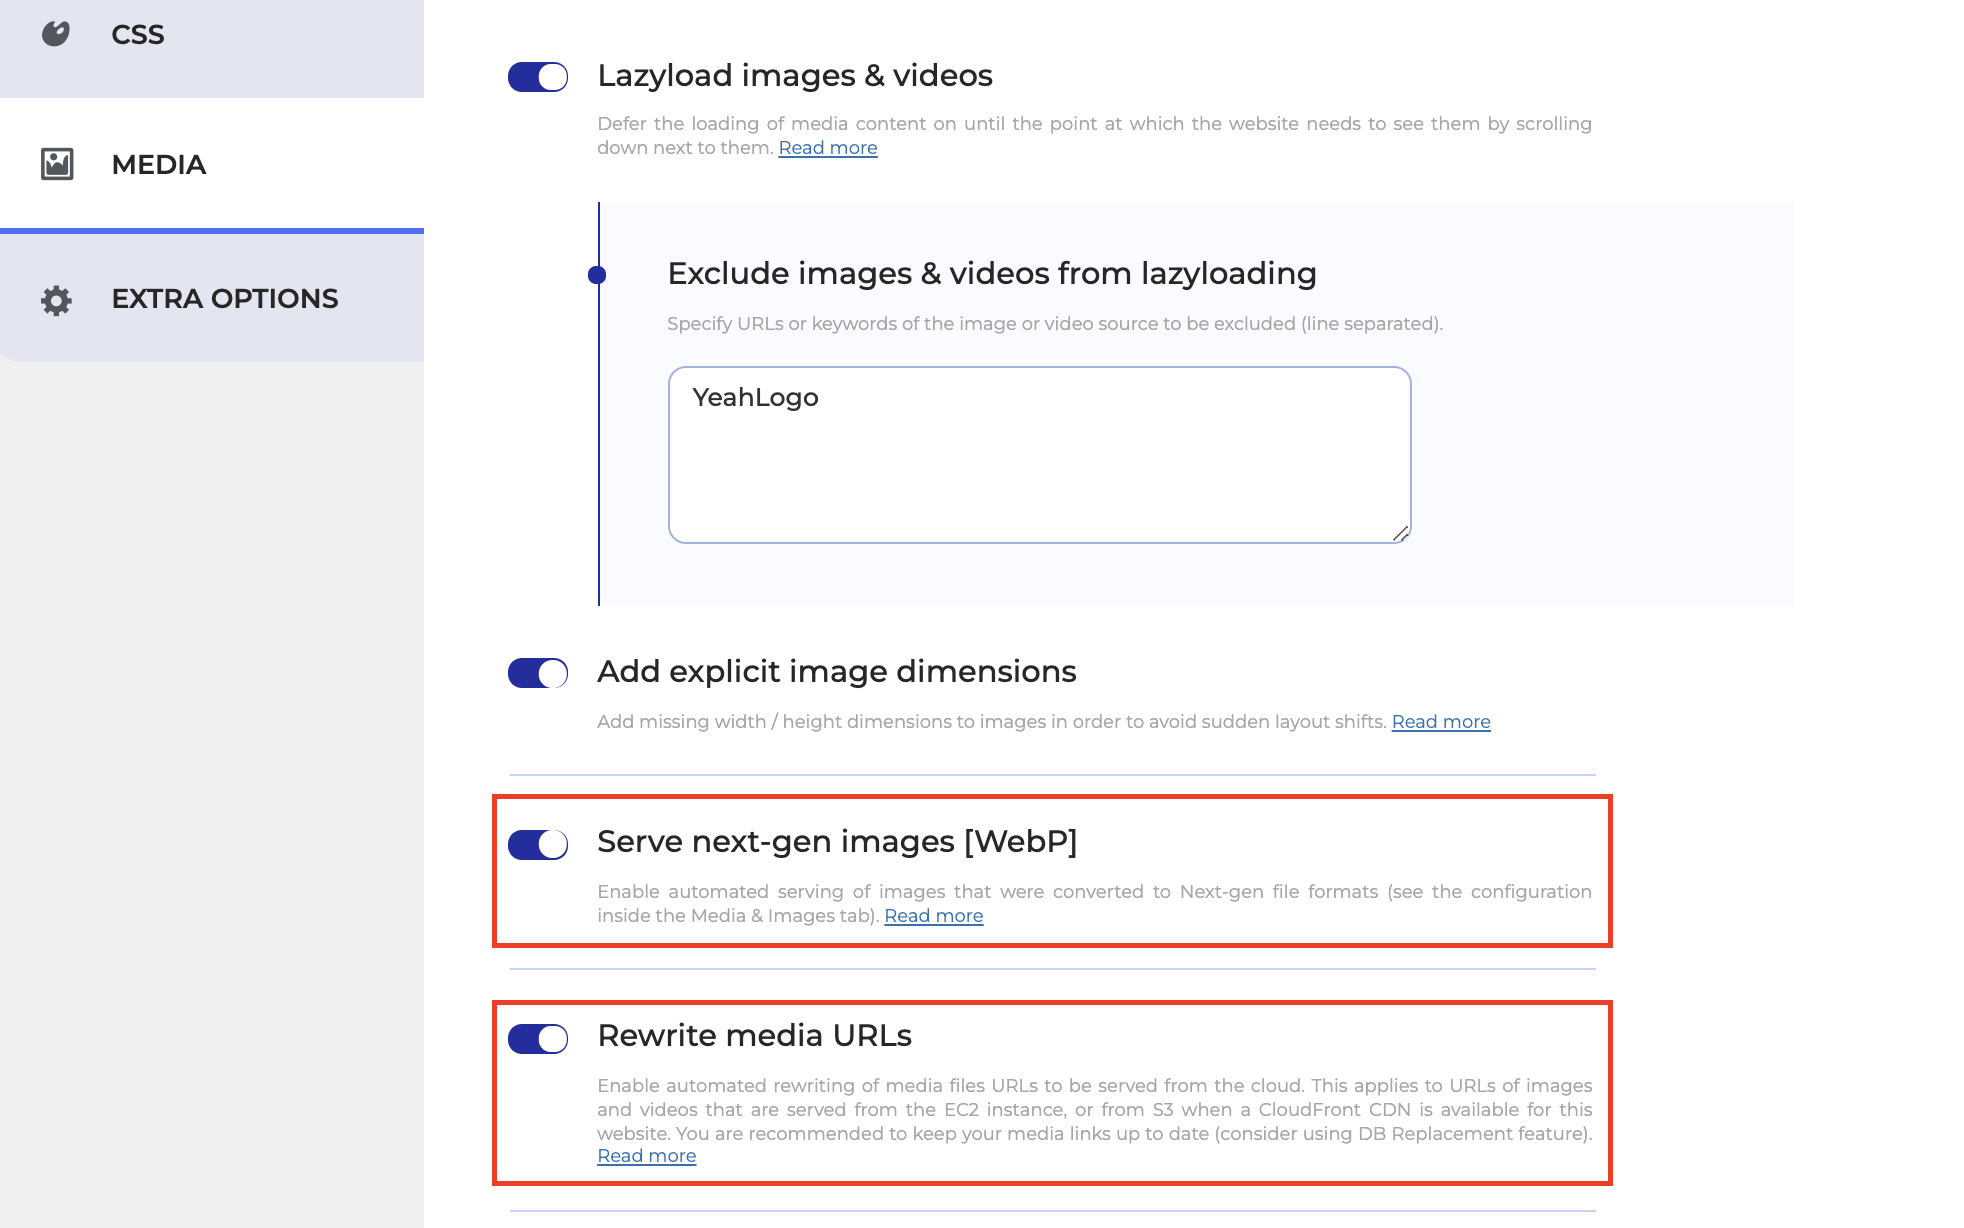
Under Site Optimizer > Media, click Lazyload images & videos. As a rule of thumb, it is best to exclude all images that appear above the fold. Images such as:
- logos
- icons that appear in the header
- and hero images
should be excluded:
To be on the safe side, please make sure that the images served on your mobile device also match the same image file names on your desktop.
Forgetting to exclude images that appear above the fold may cause Cumulative Layout Shift (CLS) issues.
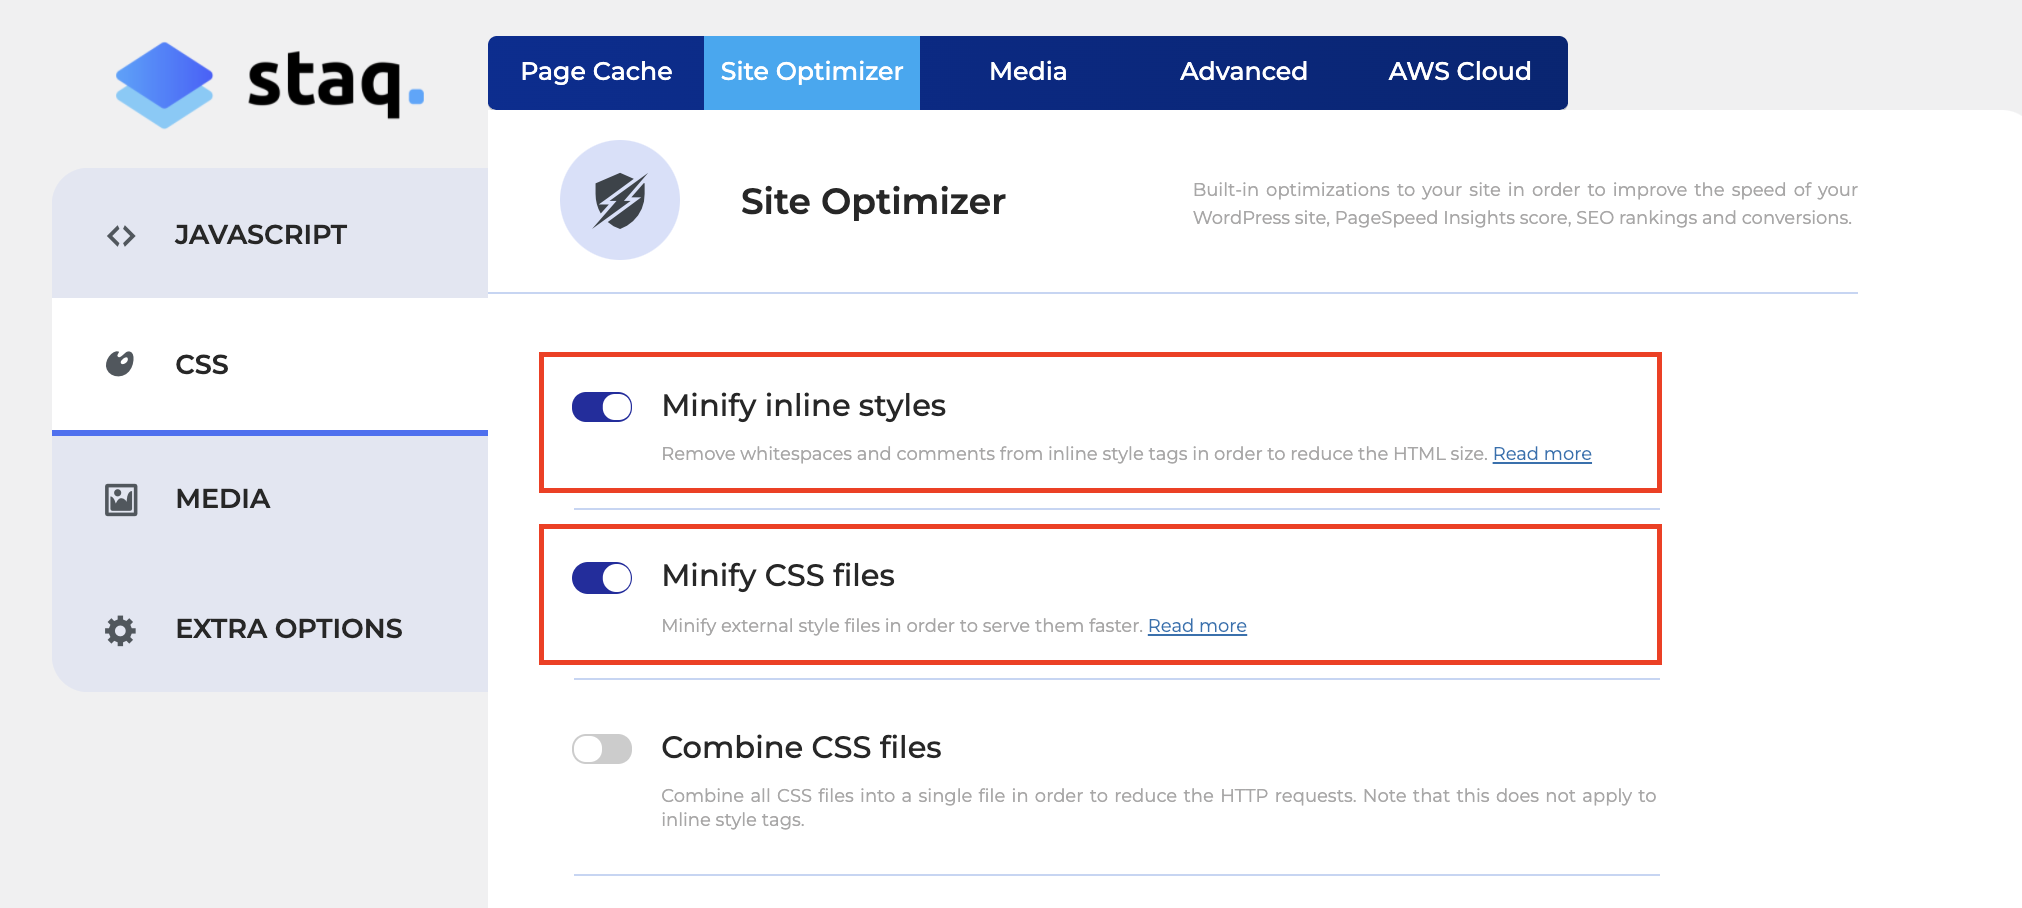
Under Site Optimizer > CSS, click:
- Minify inline styles
- Minify CSS files
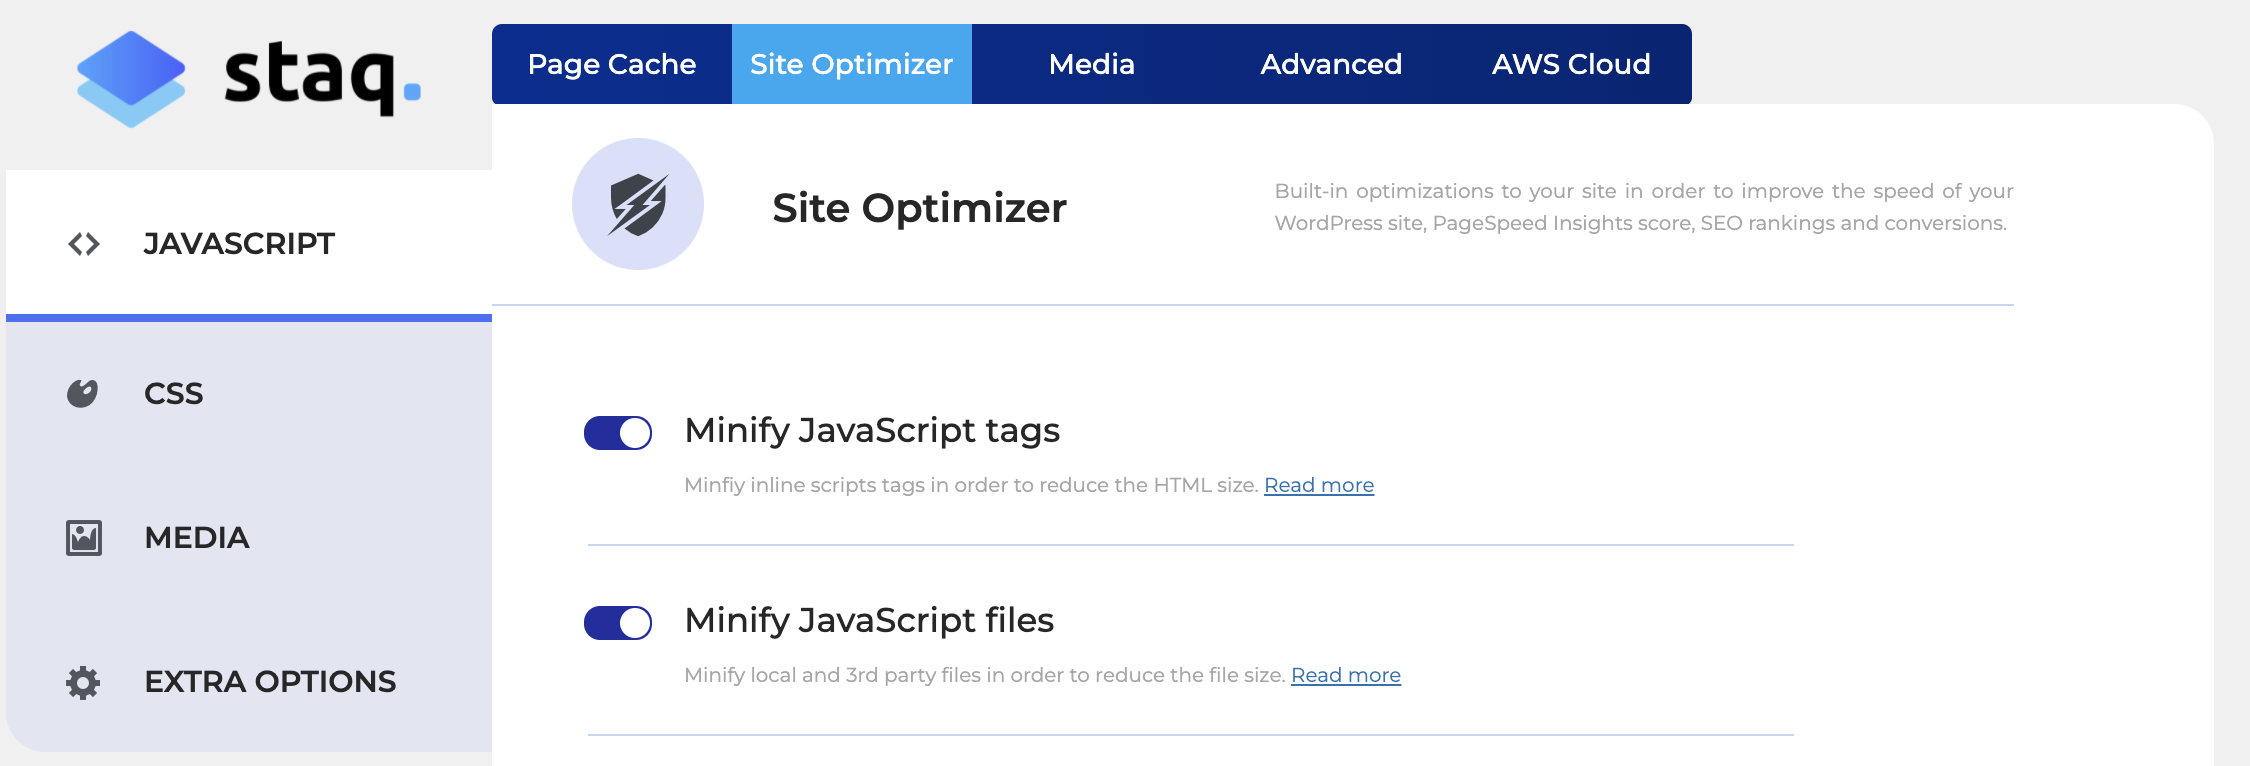
Under Site Optimizer > CSS, click:
- Minify JavaScript tags
- Minify JavaScript files
Serving images in next-gen format means serving images in WebP format. Go to Site Optimizer > Media and click Serve next-gen images [WebP] and also enable Rewrite media URLs for the cached file to show WebP images:
Generally, using our tool will either reduce or eliminate this from being an issue.
However, there are 2 features that you can adopt that will assist.
Go to Staq Panel for the site in question and click CDN:
[IMAGE]
You'll see:
- Next-Gen CDN (recommended)
- Traditional CDN
Next-Gen CDN Cache
This feature will deploy the entire website into the CDN. This means that the server will not receive any request as the site is delivered from the closest data center.
The Time To First Byte (TTFB) and load time will be relatively similar across the globe. Typically, optimized sites are fast in the same location as the origin server but are slow across the globe. This feature eliminates this issue.
Traditional CDN
The CDN will offload to AWS CloudFront the following:
- images and videos
- plugins
- theme
The origin-server will still handle each request.
COMING SOON: A FEATURE TO REMOVE UNUSED CSS AND ONLY SHOW USED CSS
In the meantime, until our new feature is released, we do not modify CSS files beyond minification.
Typically, following the Eliminate render-blocking resources instruction in this document will either reduce the execution time or remove this entry from the list.
Regardless, it isn't a significant score-breaker inside the calculator of PageSpeed Insights if this isn't followed.
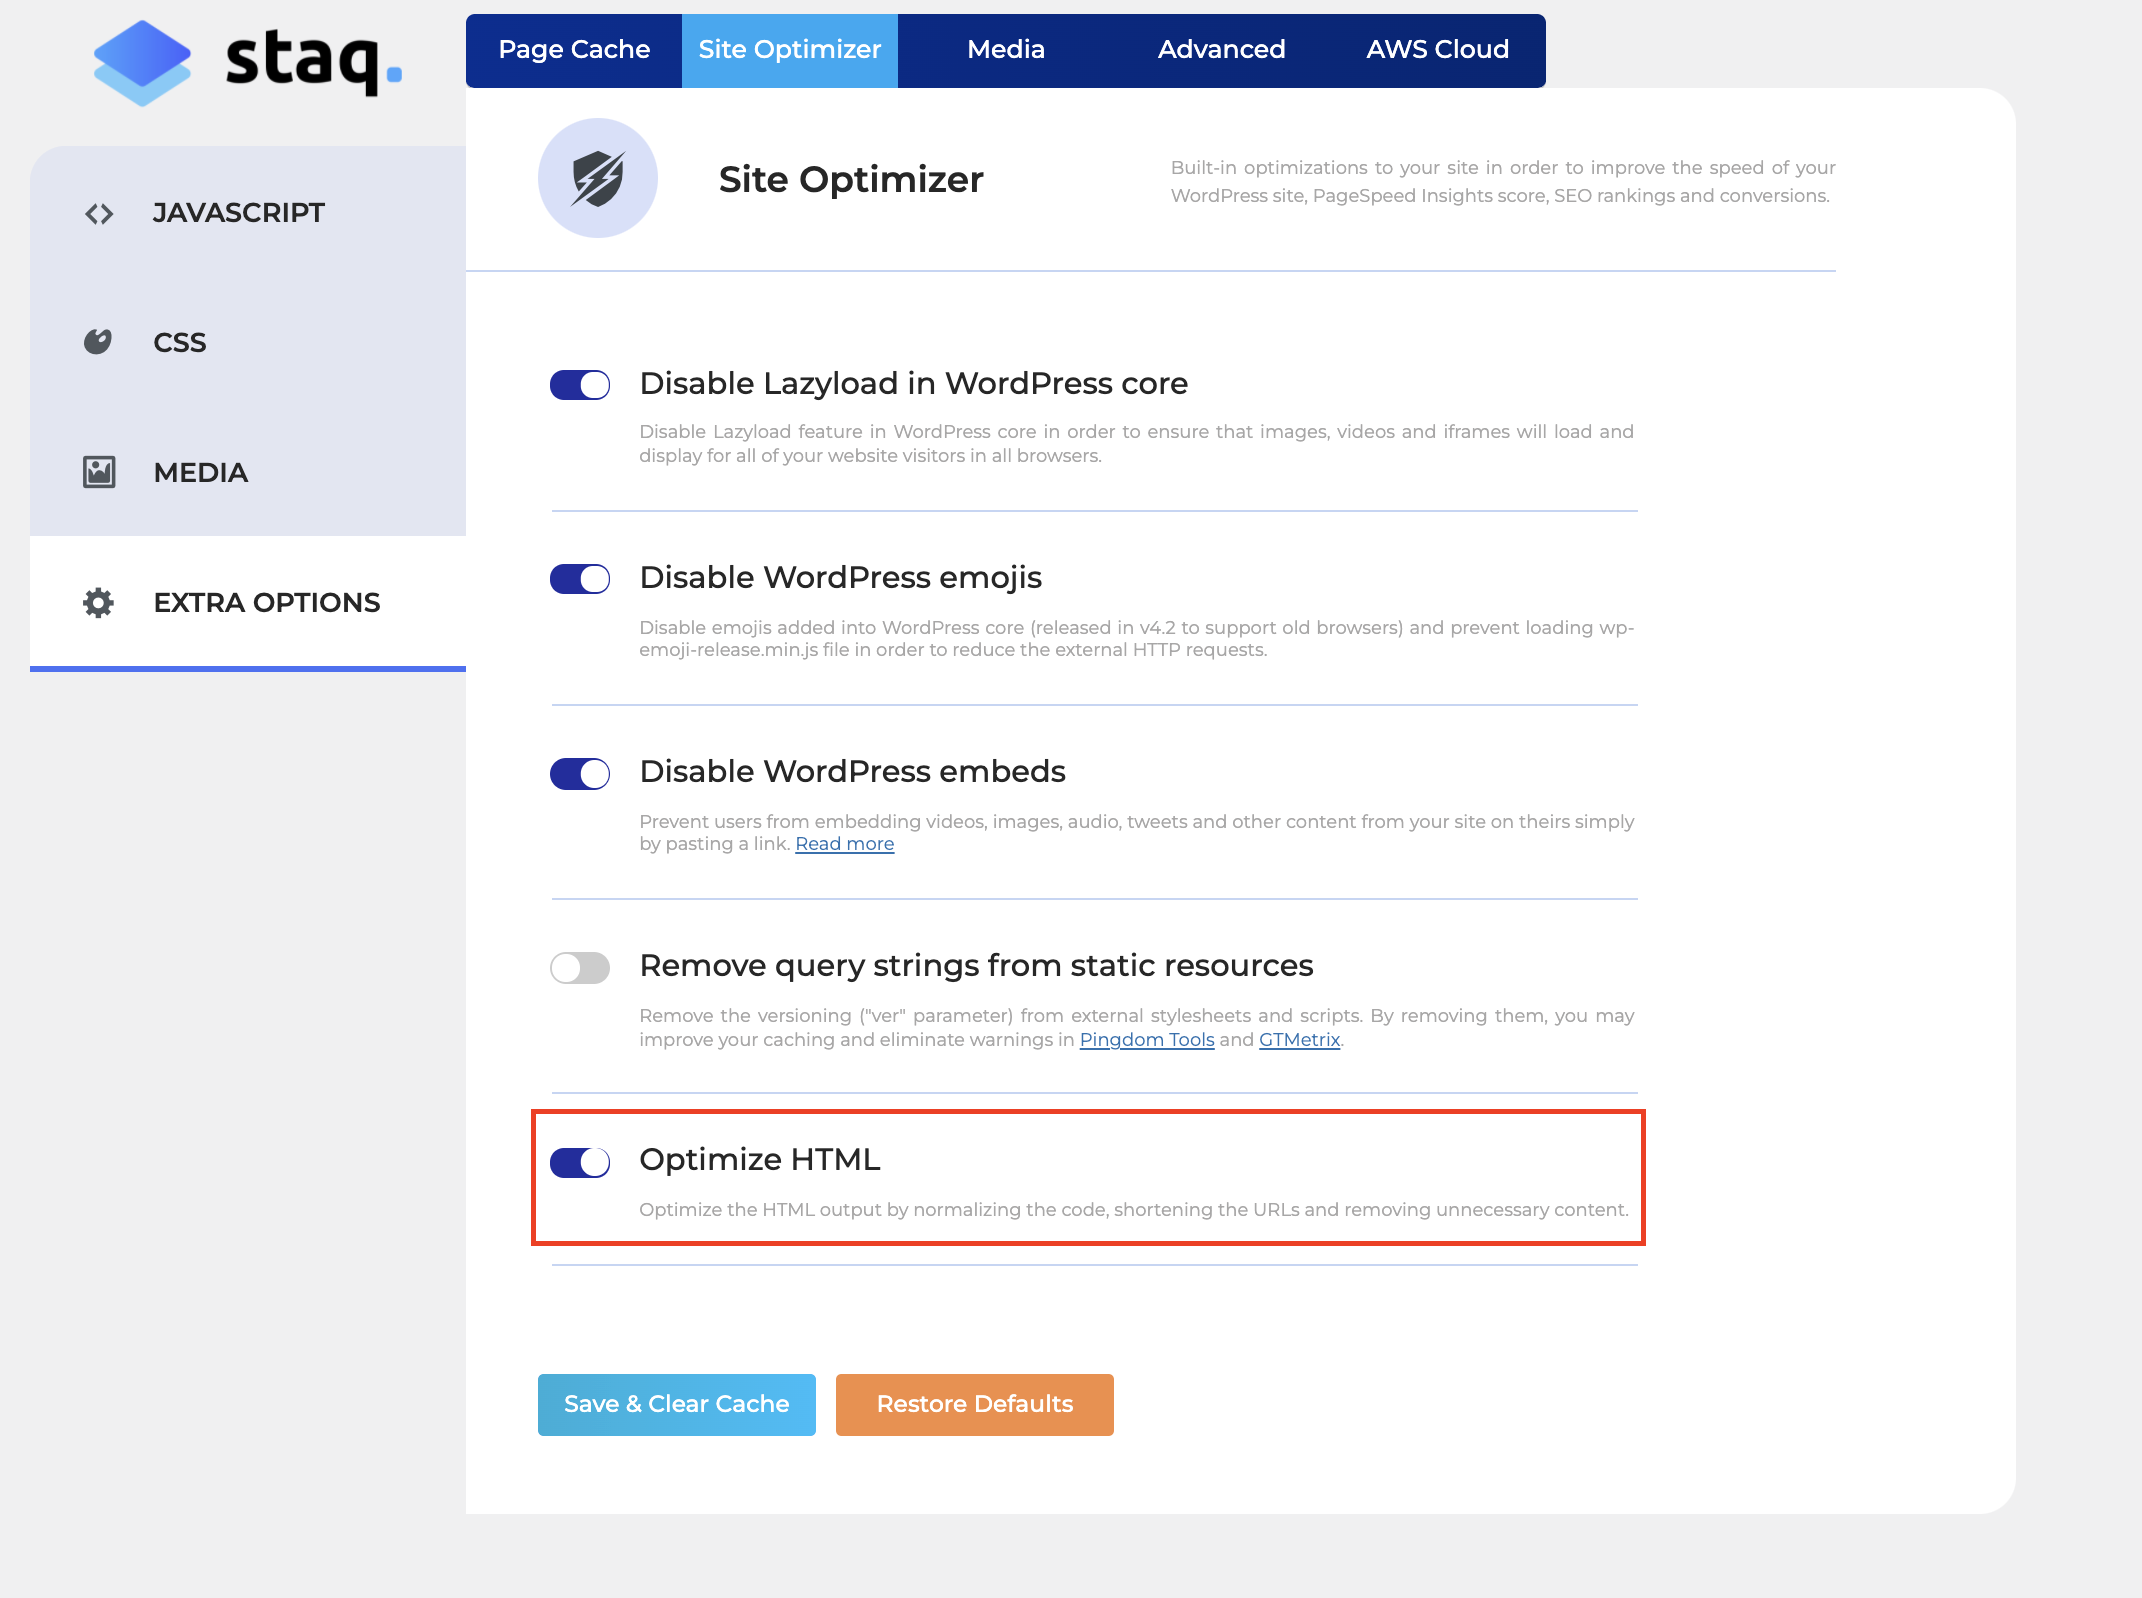
Go to Site Optimizer > Extra Options, and enable Optimize HTML in order to reduce your DOM size:
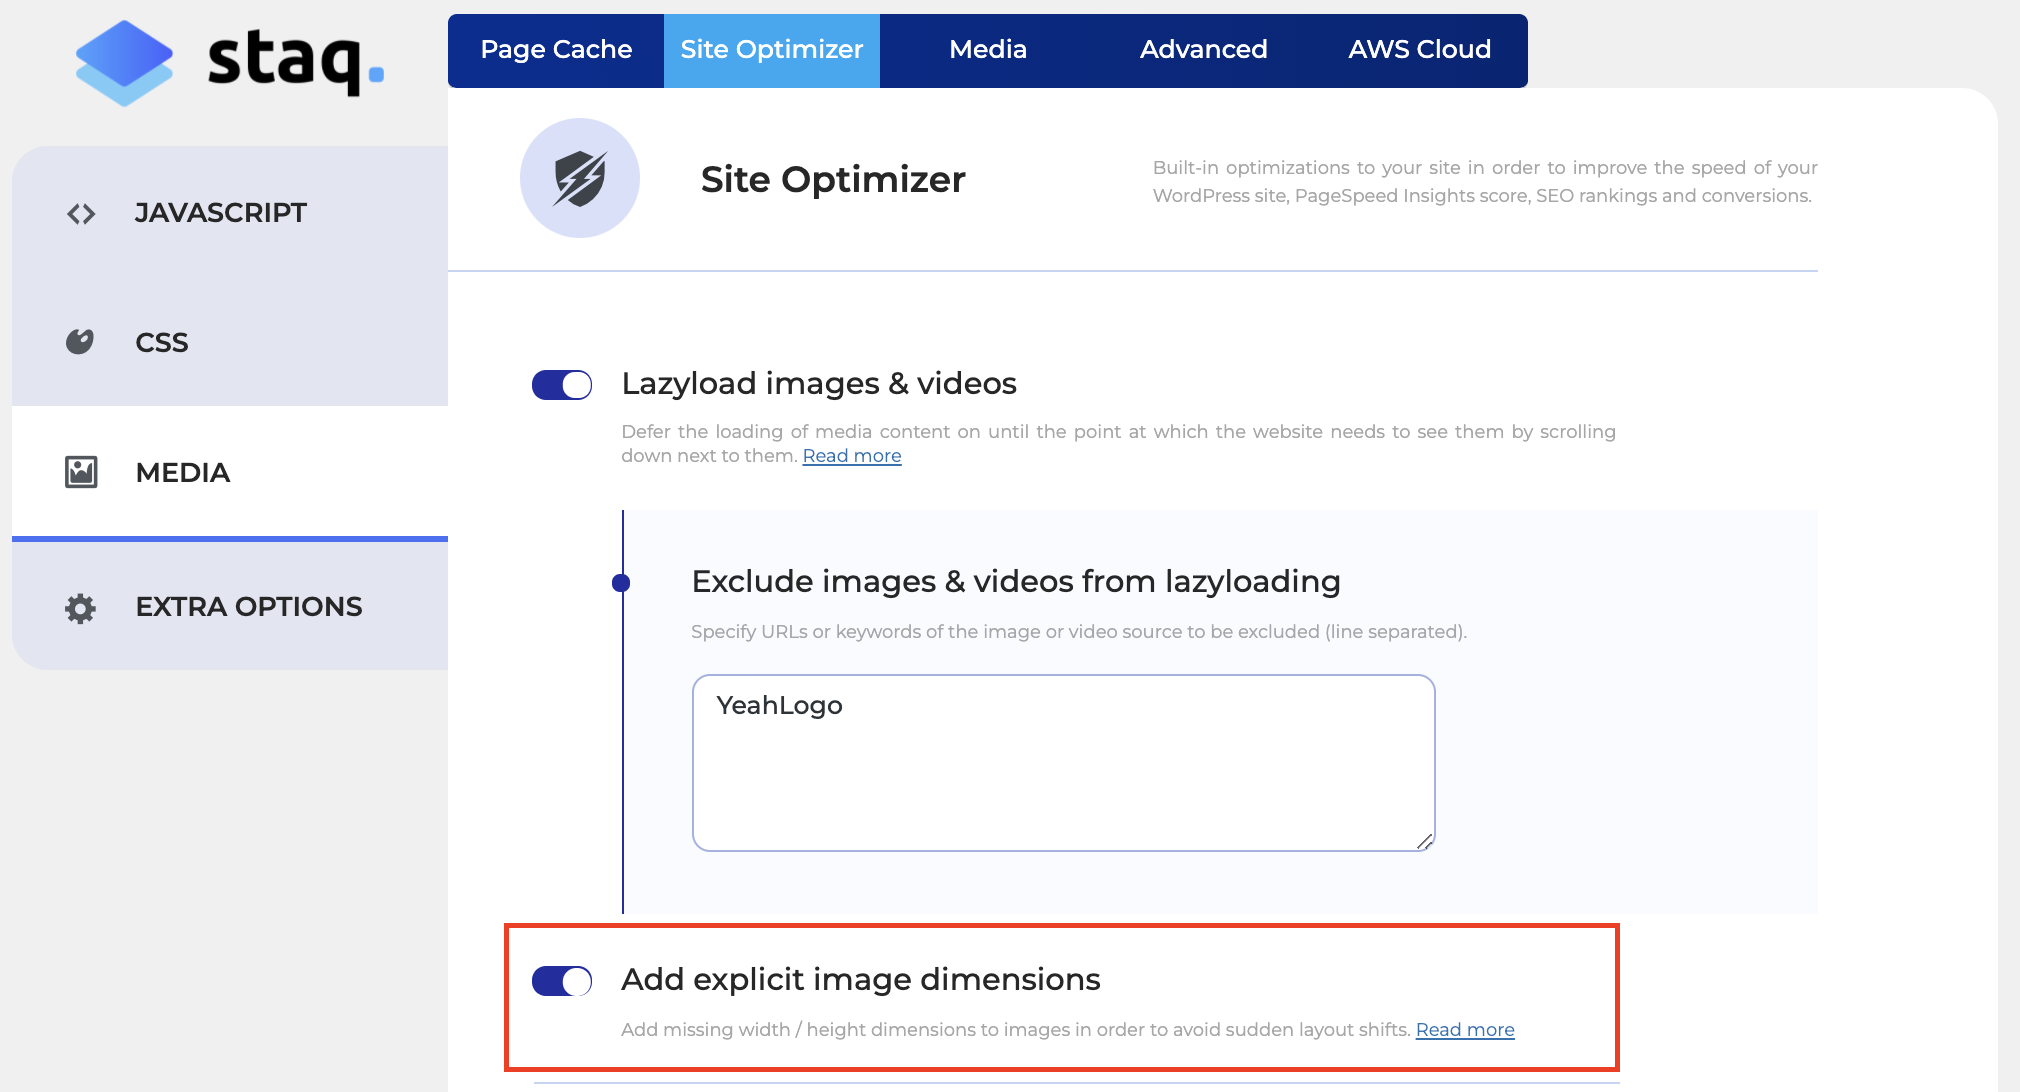
Under Site Optimizer > Media, enable Add explicit image dimensions:
Believe it or not, Google Fonts causes harm to your PageSpeed Insights score. By default, if the Optimizer is enabled, Staq will automatically apply it as Combine and apply display:swap which is best practice according to Google.
However, removing Google Fonts can improve your PageSpeed Insights score.
Select Remove Google Fonts. Double-check your website to see if it doesn't hinder the look and feel of the website as you may wish to revert it to Combine and apply display:swap:
Under Site Optimizer > Media, copy and paste the image link that you wish to preload images under the Preload images section.
If you wish to preload WebP images, please ensure you also add the WebP link.
This means two things:
- resize images so you're not serving Full-Size images
- optimize and compress images.
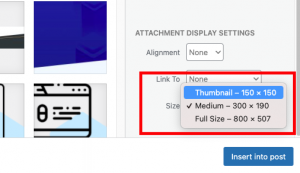
Full-Size Images
Avoid using full-size images. Instead, select the resized image based on the settings inside the WordPress builder:
Optimize and Compress Images
Staq allows you to optimize and compress images automatically.
You can compress the following images:
- png
- jpg
- WebP
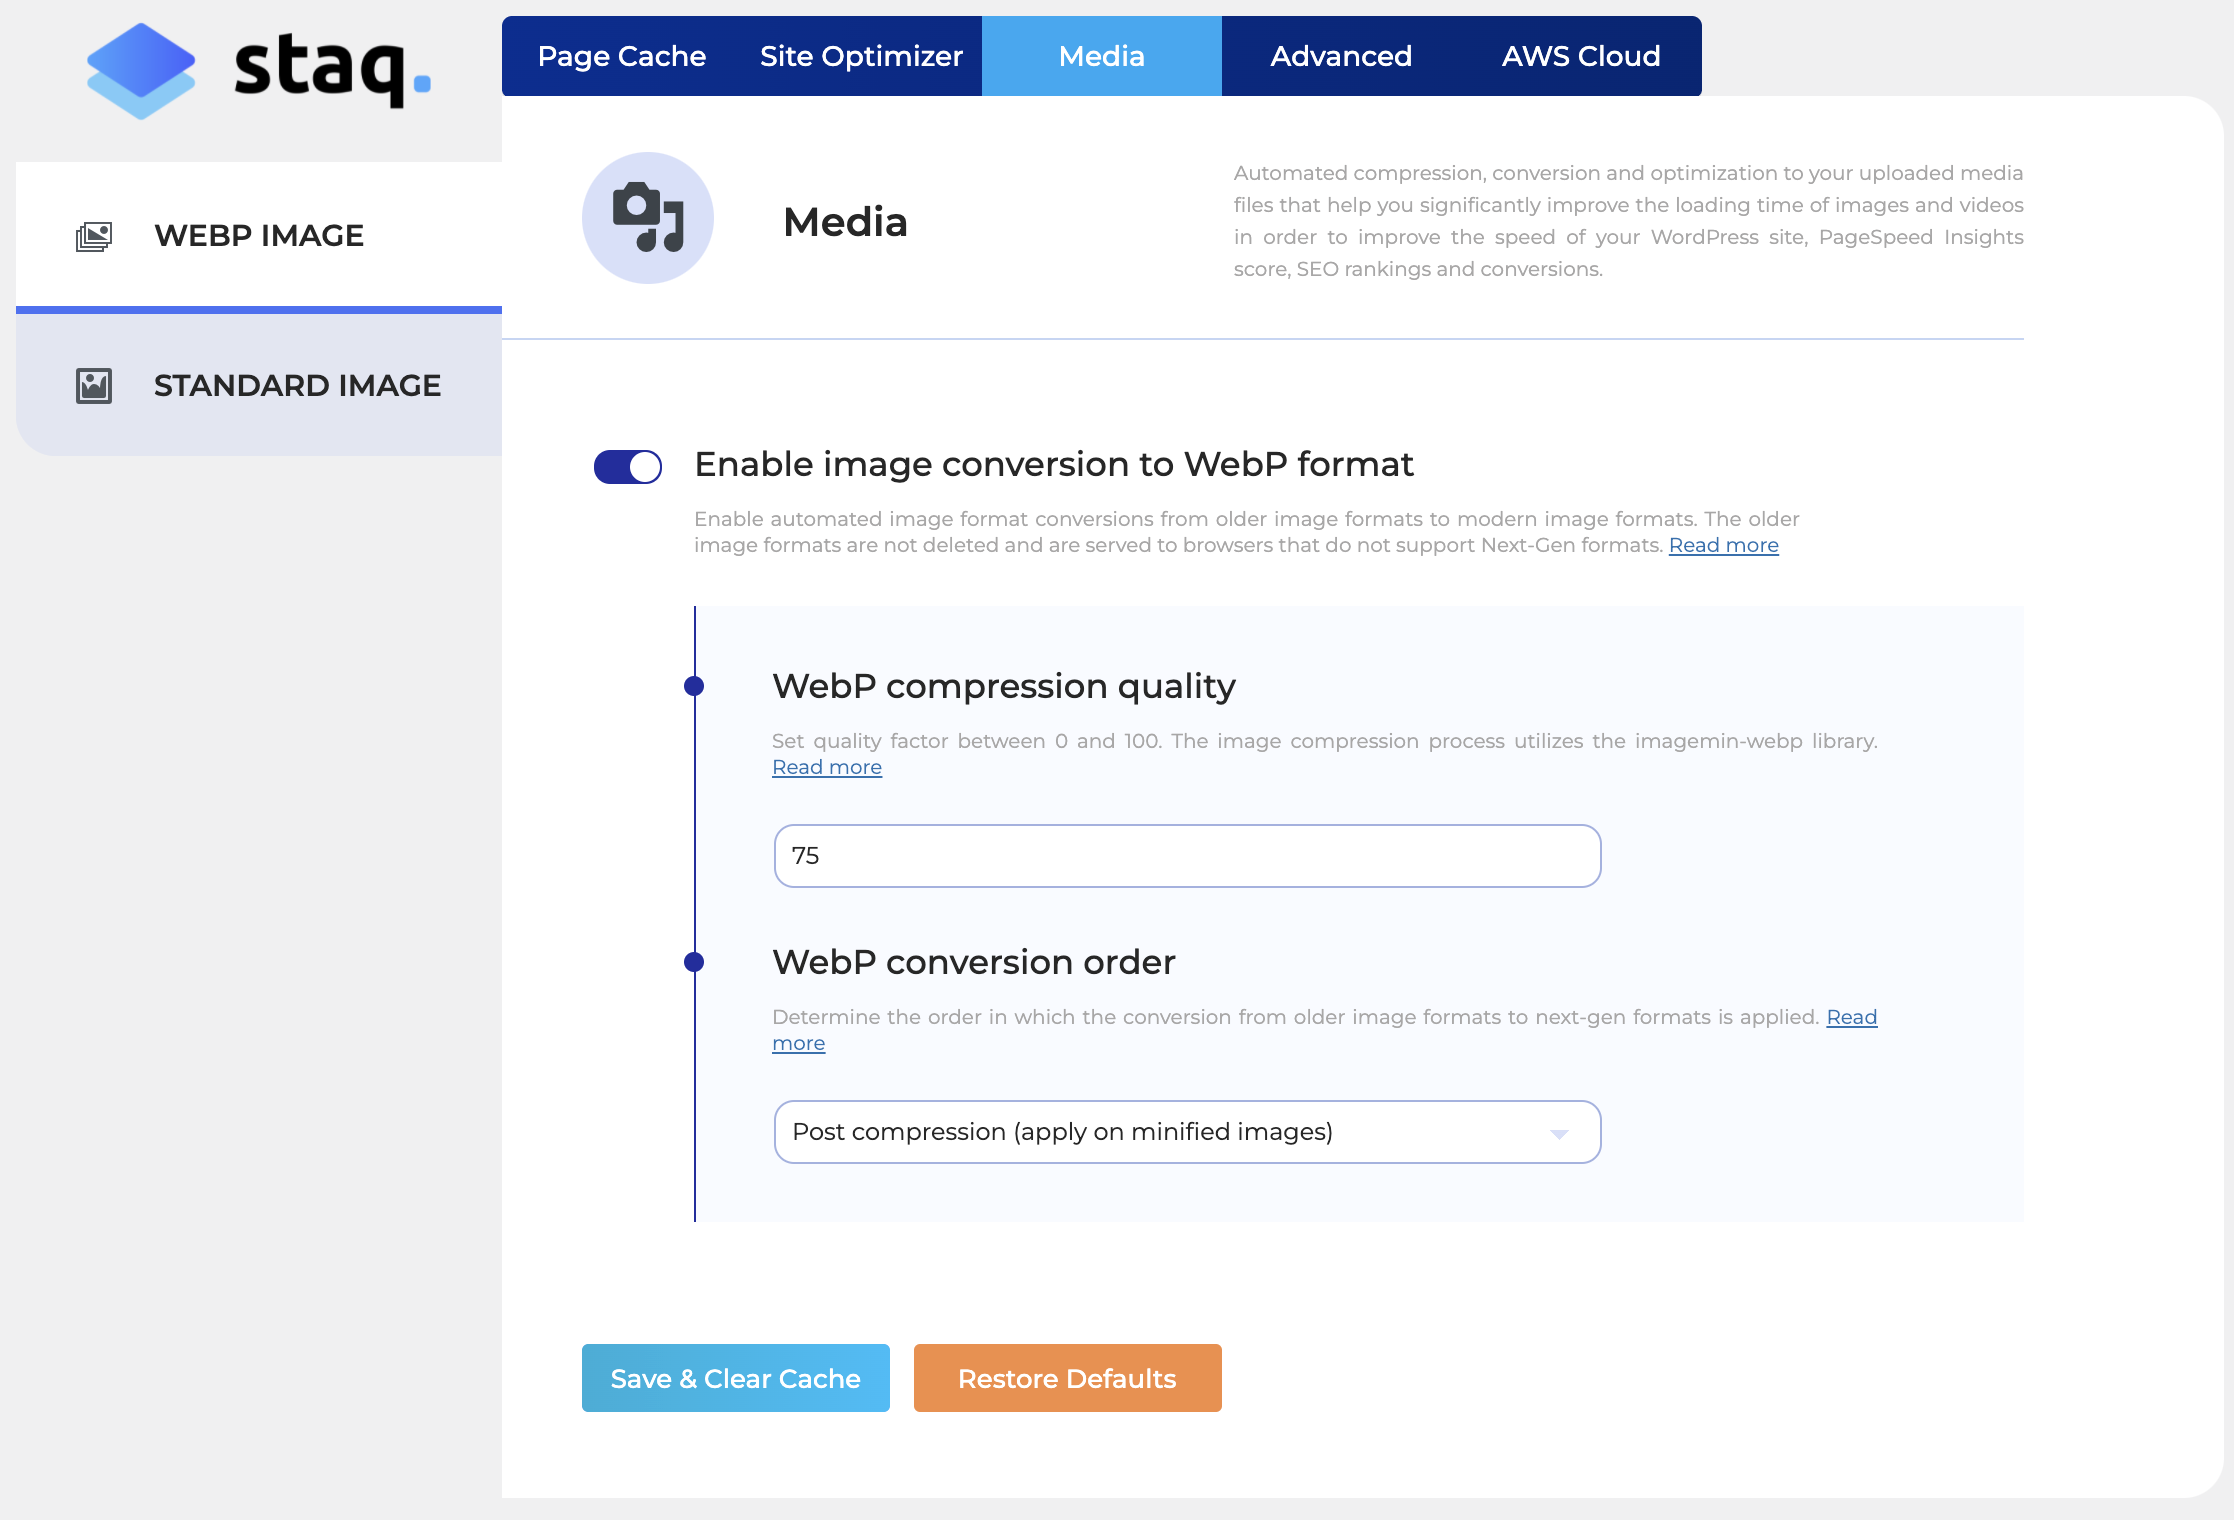
Inside Staq Hosting, click Media in the horizontal tab. Then, click WEBP Image and Standard Image. From there, you can play with the settings:
Please note that when an image is uploaded via Media Library in WordPress whilst hosted on Staq, we transfer the original image into an AWS S3 bucket for safekeeping and via AWS Lambda, compress and optimize the duplicate image.
Staq will always have the original image you've uploaded just in case you wish to change the compression settings in the future.
The instructions below are to be used if you wish to have more control of how your javascript files and scripts load along with pushing your PageSpeed Insights score even further.
JavaScript optimization Guide
Recommended JavaScript optimization
With this method, we are combining all safe JavaScript files and then combining it into a single file. Then, we delay that combined JS file. You can then exclude certain JS files from being delayed. Those scripts did not form part of the combined process.
Steps
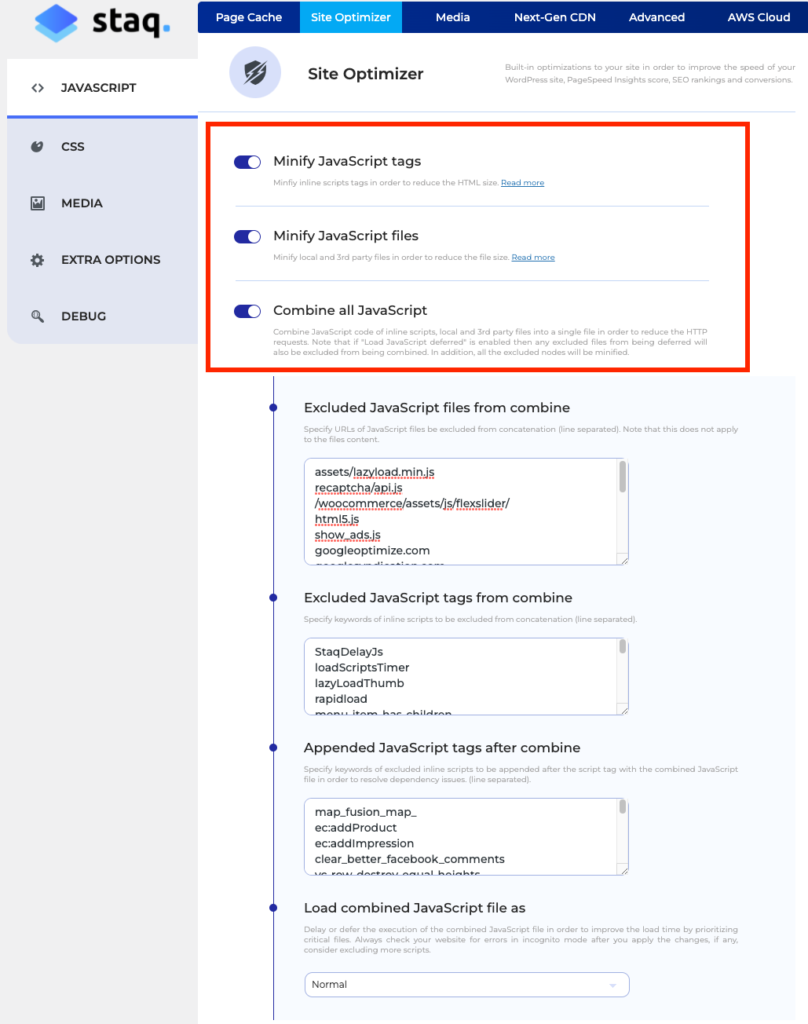
Enable the first 3 JS settings:
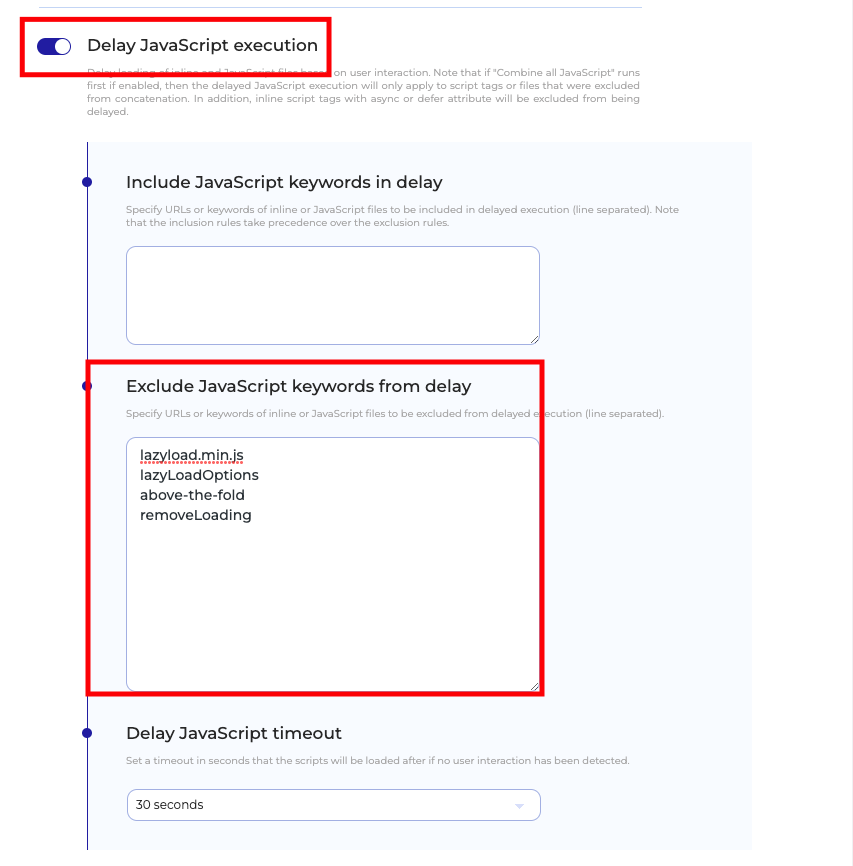
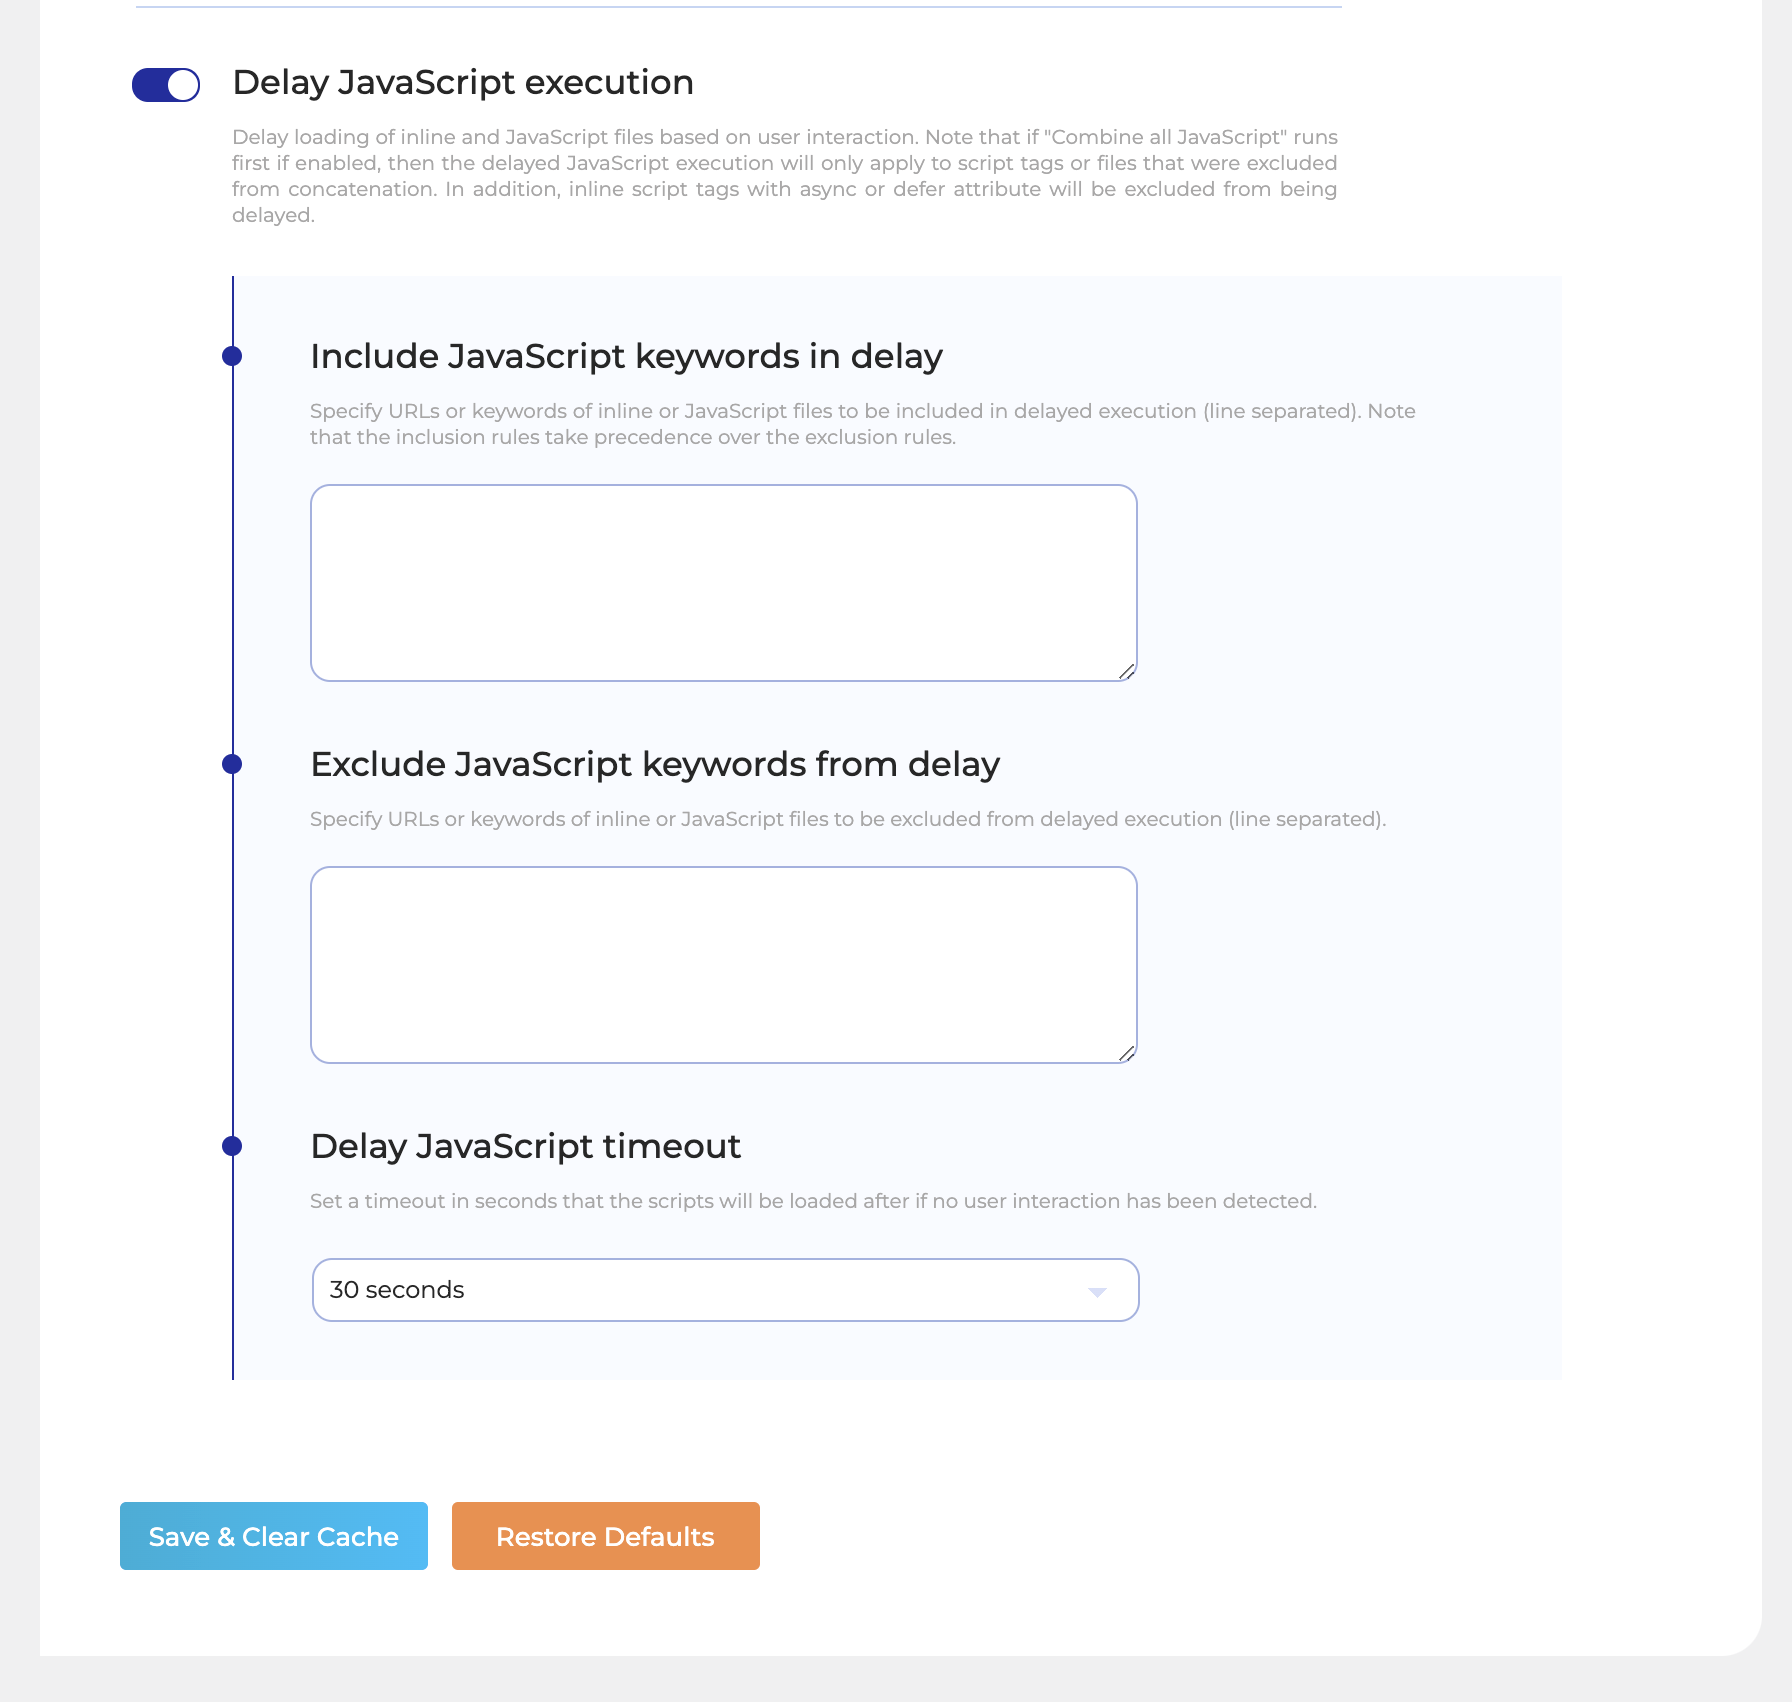
Then, under Delay JavaScript execution, delete the default entries under Exclude JavaScript keywords from delay and copy and paste the following entries into the list instead:
lazyload.min.js
lazyLoadOptions
above-the-fold
removeLoading
Test
Then, go to the website in Incognito mode and make sure:
- the Inspect window is open
- it is selected on the Network tab
- the JS tab is selected.
Then, go ahead and refresh your screen with your keyboard.
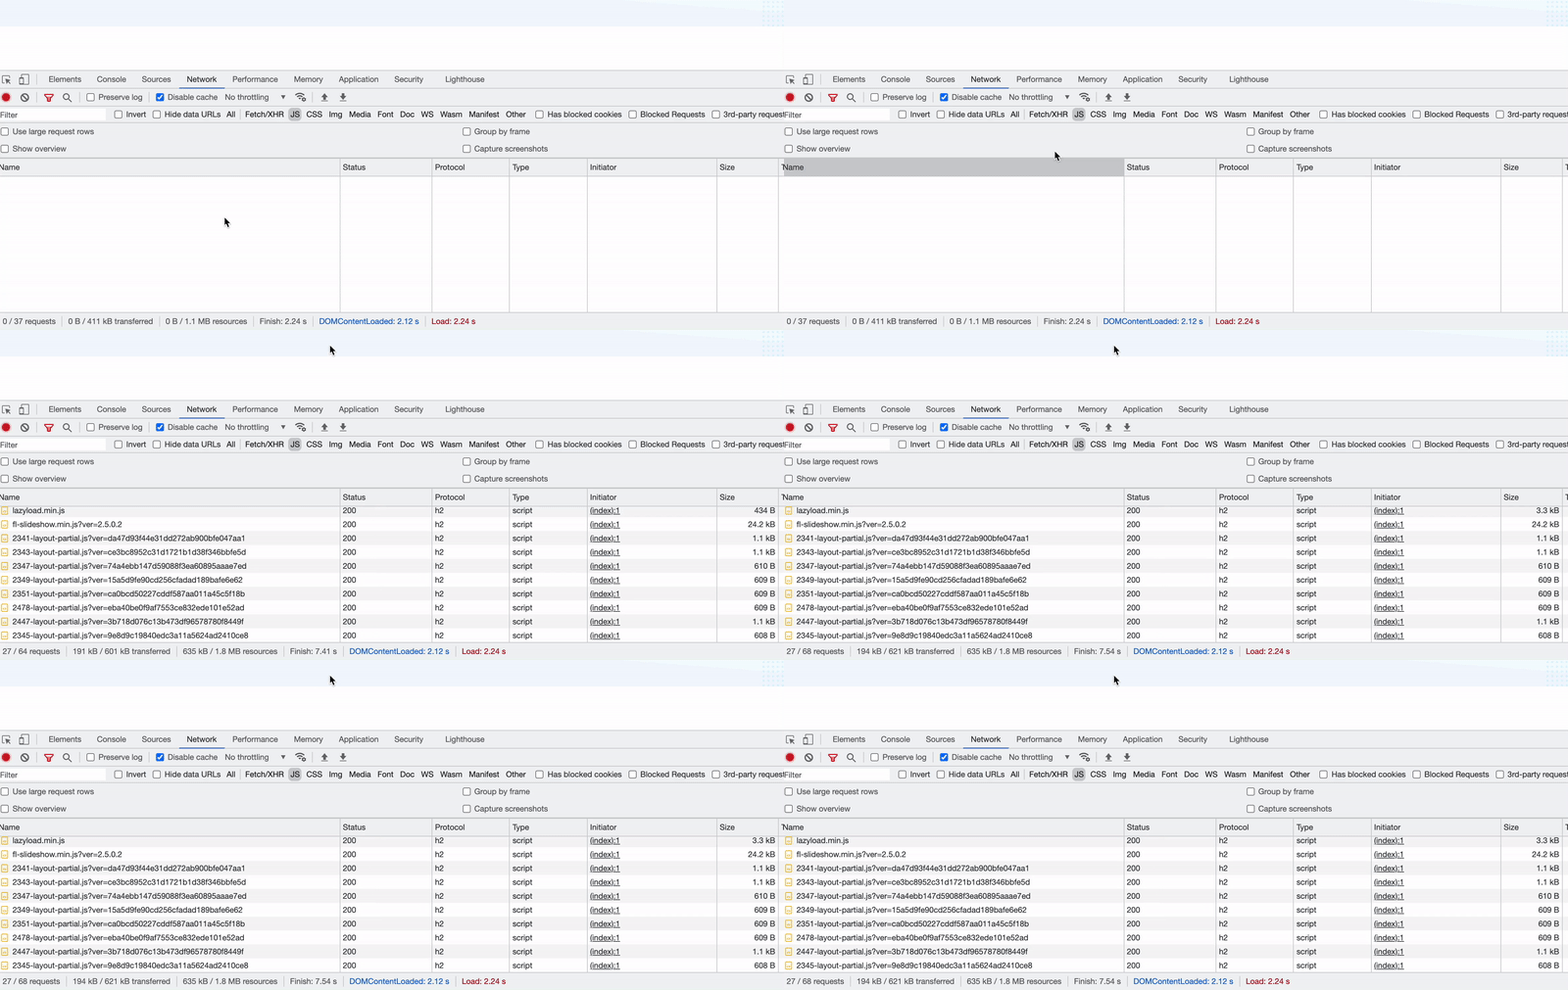
Under the JS tab, you should notice that no scripts will load until you move your mouse or keyboard as per the screenshot below:
After, go ahead to the testing phase to ensure the site works perfectly. If so, you're done. If it requires tweaks, refer to the tutorial below.
QUICK TIP: It is recommended that you turn off animation to all elements that appear above the fold only. The animation is powered by JavaScript which will give you a blank section until you move your mouse.
If this strategy worked for you, then go to the Testing section, below.
If it did not work, then you'll need to carefully select which JavaScript files and scripts to delay. Instructions on how to do this appear below.
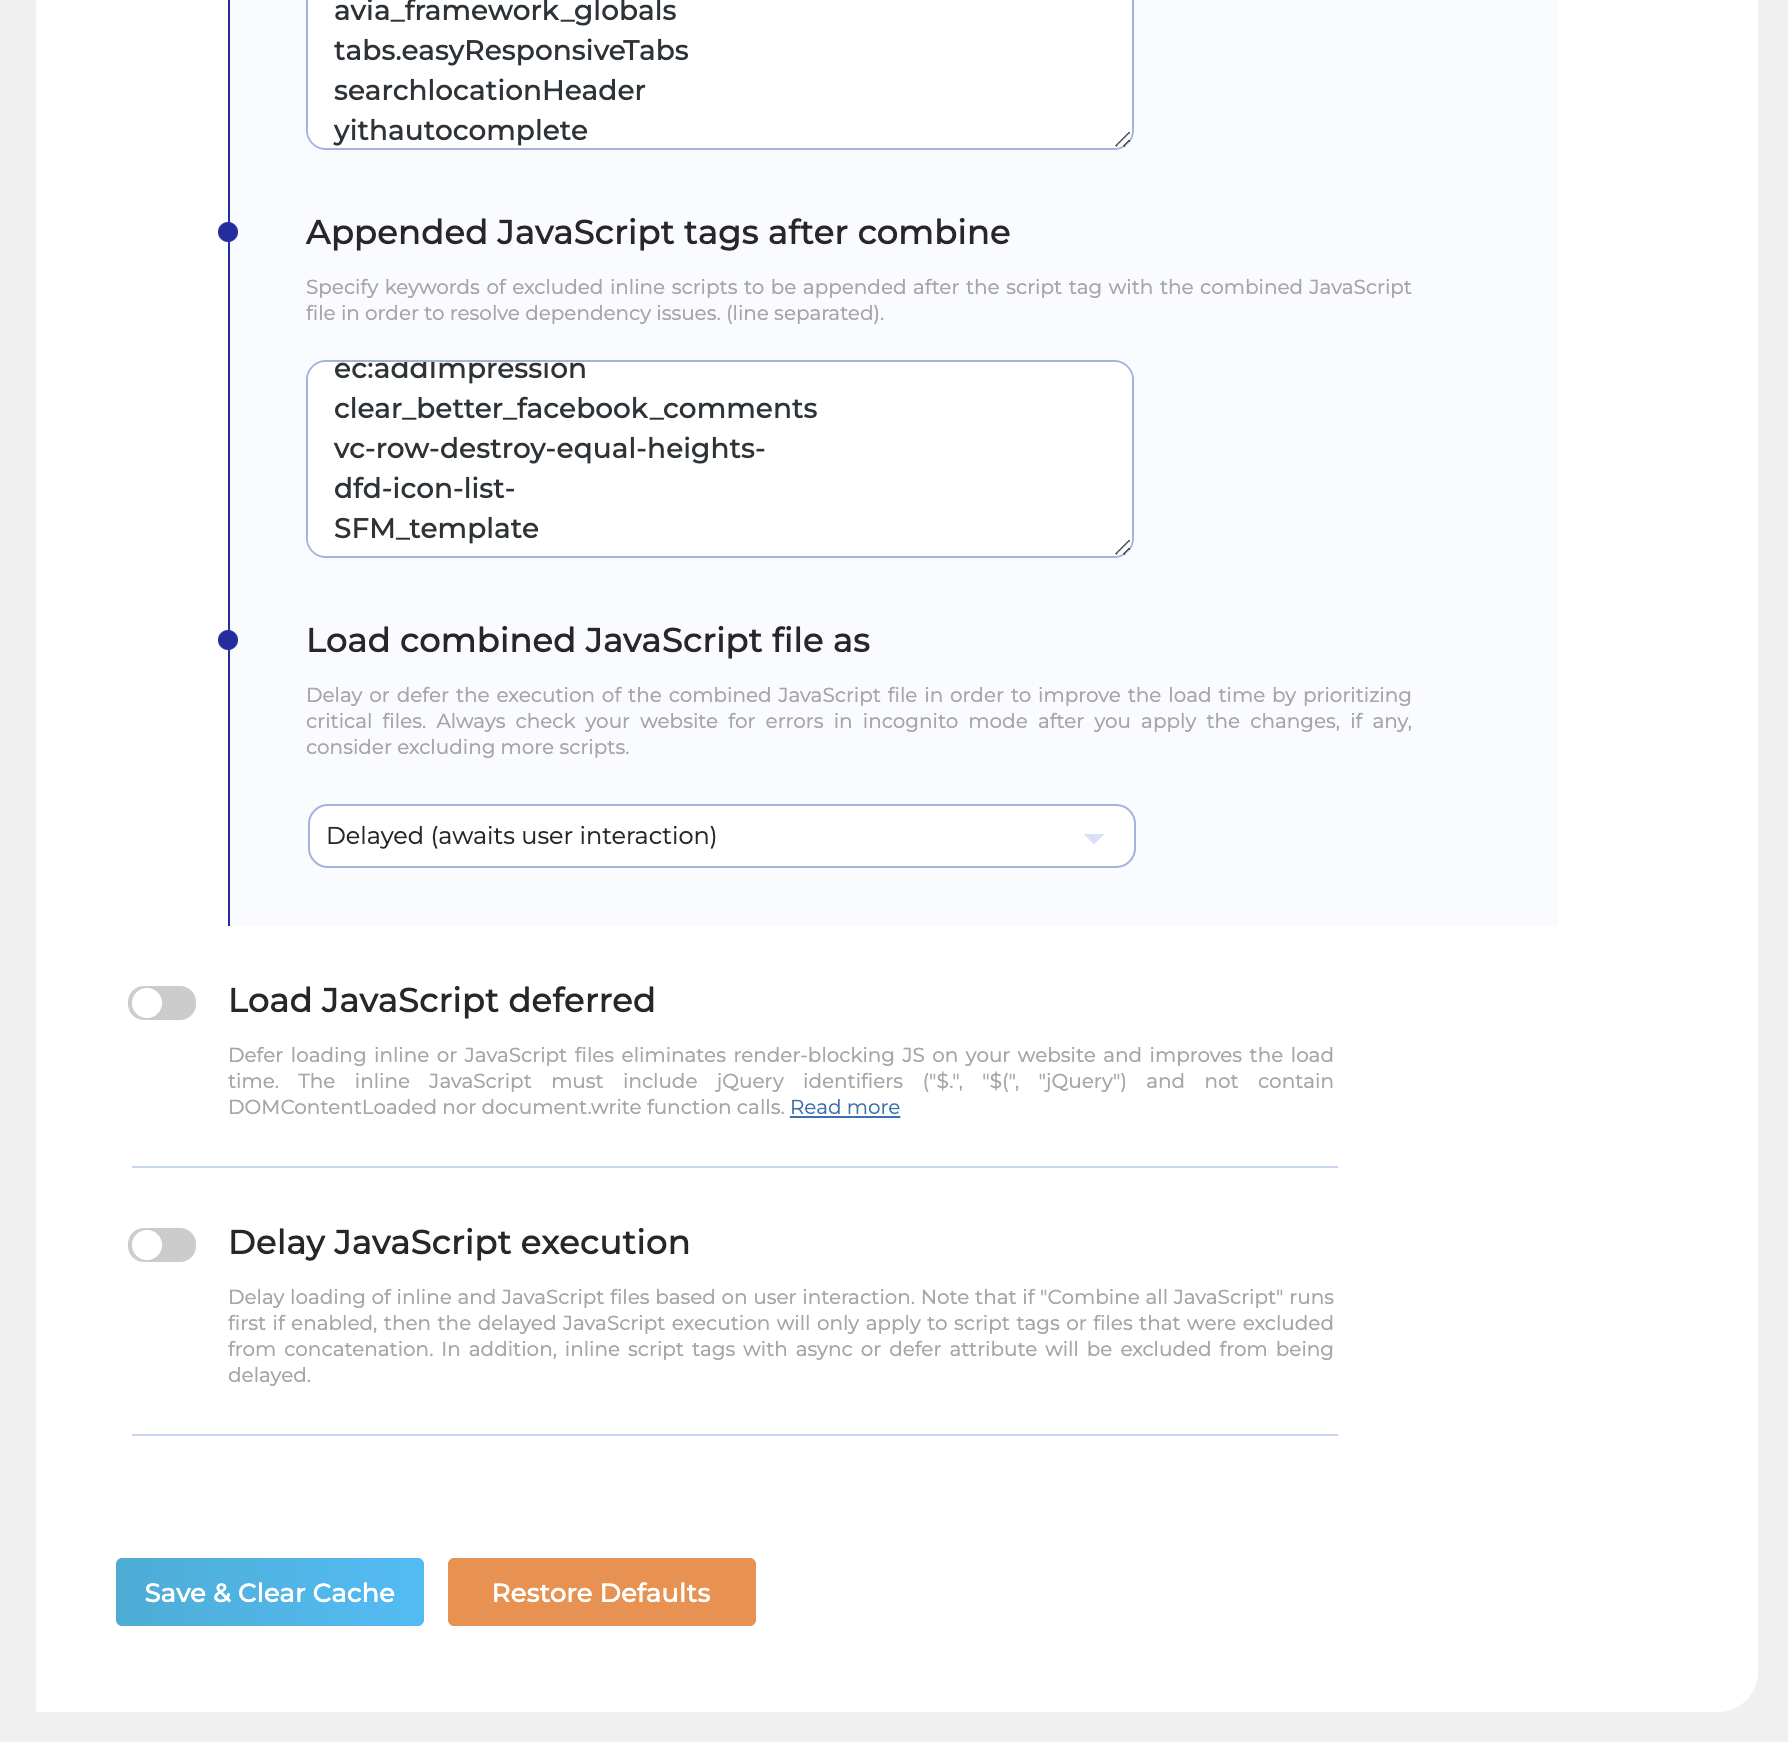
If you wish to reverse this, click Restore Defaults under the JavaScript page of the Staq tool. Please note that it'll only restore the settings on this page and not the entire optimization setup.
Aggressive JavaScript optimization
**TRY WITH CAUTION**
This strategy does not work for all websites, however, it is a quick and easy solution to apply and may work for you.
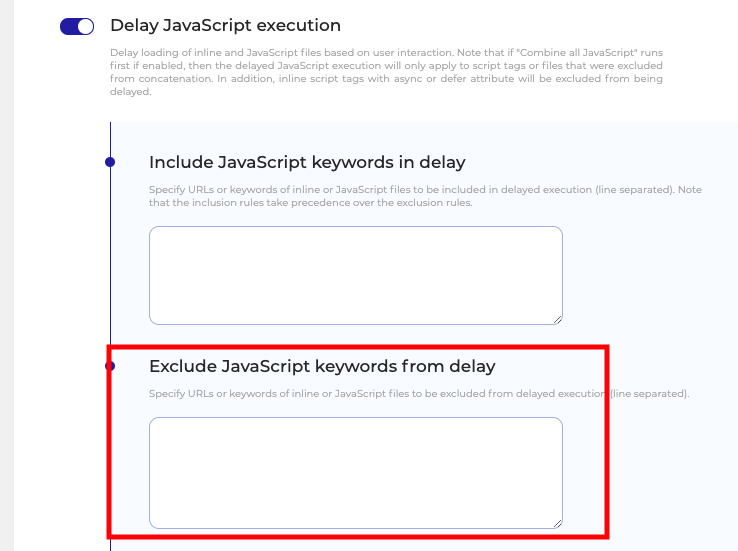
Under Delay JavaScript execution, go to Exclude JavaScript keywords from delay and delete all excluded file names. This will make this list empty:
Then, go to the website in Incognito mode and make sure:
- the Inspect window is open
- it is selected on the Network tab
- the JS tab is selected.
Then, go ahead and refresh your screen with your keyboard.
Under the JS tab, you should notice that no scripts will load until you move your mouse or keyboard as per the screenshot below:
After, go ahead to the testing phase to ensure the site works perfectly. If so, you're done. If it requires tweaks, refer to the tutorial below.
QUICK TIP: It is recommended that you turn off animation to all elements that appear above the fold only. The animation is powered by JavaScript which will give you a blank section until you move your mouse.
If this strategy worked for you, then go to the Testing section, below.
If it did not work, then you'll need to carefully select which JavaScript files and scripts to delay. Instructions on how to do this appear below.
If you wish to reverse this, click Restore Defaults under the JavaScript page of the Staq tool. Please note that it'll only restore the settings on this page and not the entire optimization setup.
Moderate JavaScript optimization
To see the unminified JS files, go to Site Optimizer > JavaScript and turn off both:
- Minify JavaScript tags
- Minify JavaScript files
Continue to have Delay JavaScript execution enabled with the default list of keywords listed under Exclude JavaScript keywords from delay.
Then, in Incognito mode in Chrome, open Inspect and go to Network > JS. Refresh the page with your keyboard (without moving the mouse over the page) and review all javascript files that have loaded. These files have been excluded.
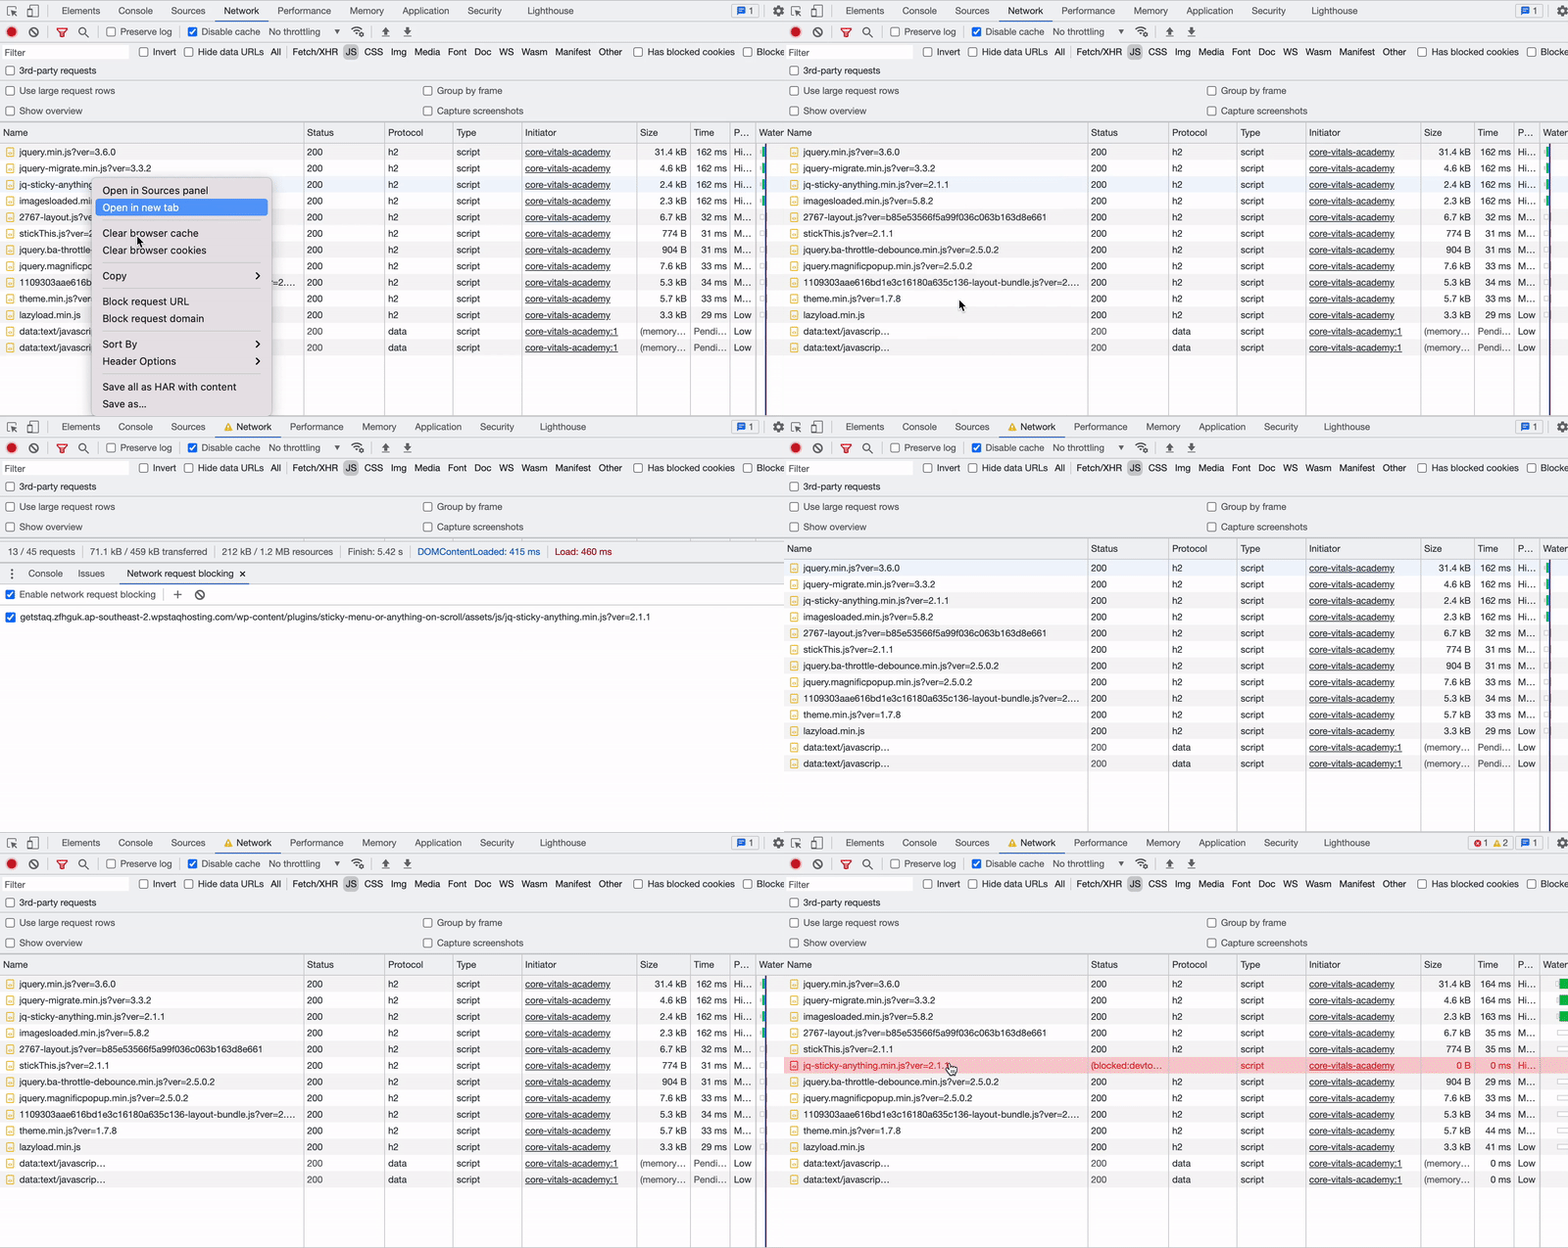
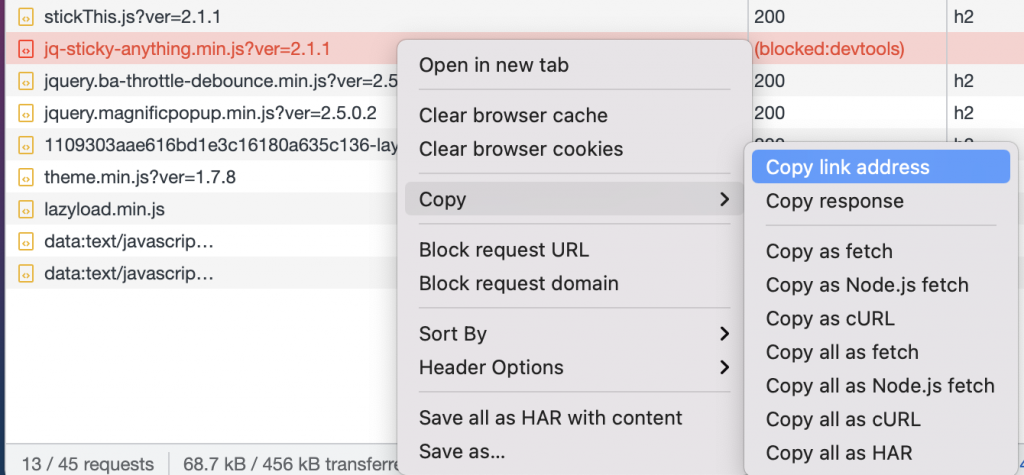
To determine if that particular JS file is required at the initial load, right-click that file and click Block request URL as per the GIF below:
Refresh the page in Incognito mode and see if anything on the website breaks. If it doesn't, then it is safe to say that this particular JS file can be delayed upon initial load.
Repeat the process.
If a file breaks the look and feel of the website, unblock the file and move to the next one.
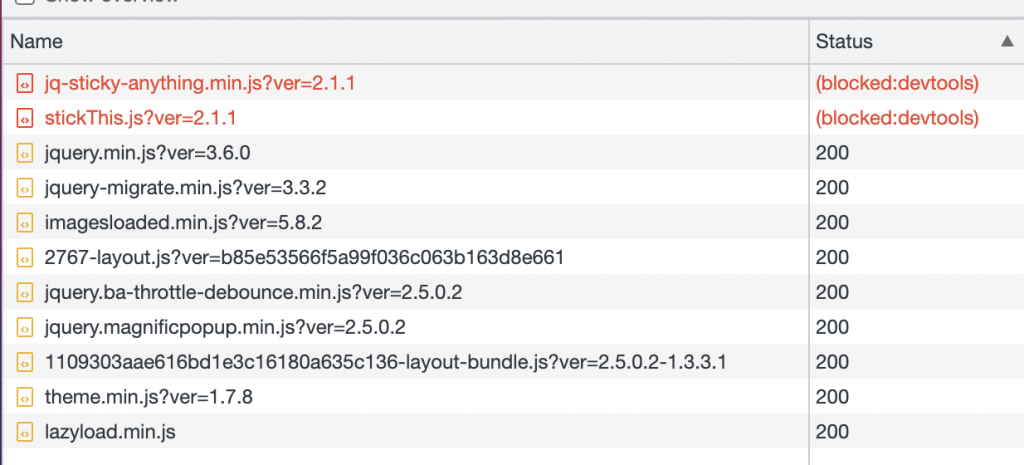
Once you're done, you should have a list of blocked JS files in red like this:
Right-click on each file and copy the URL:
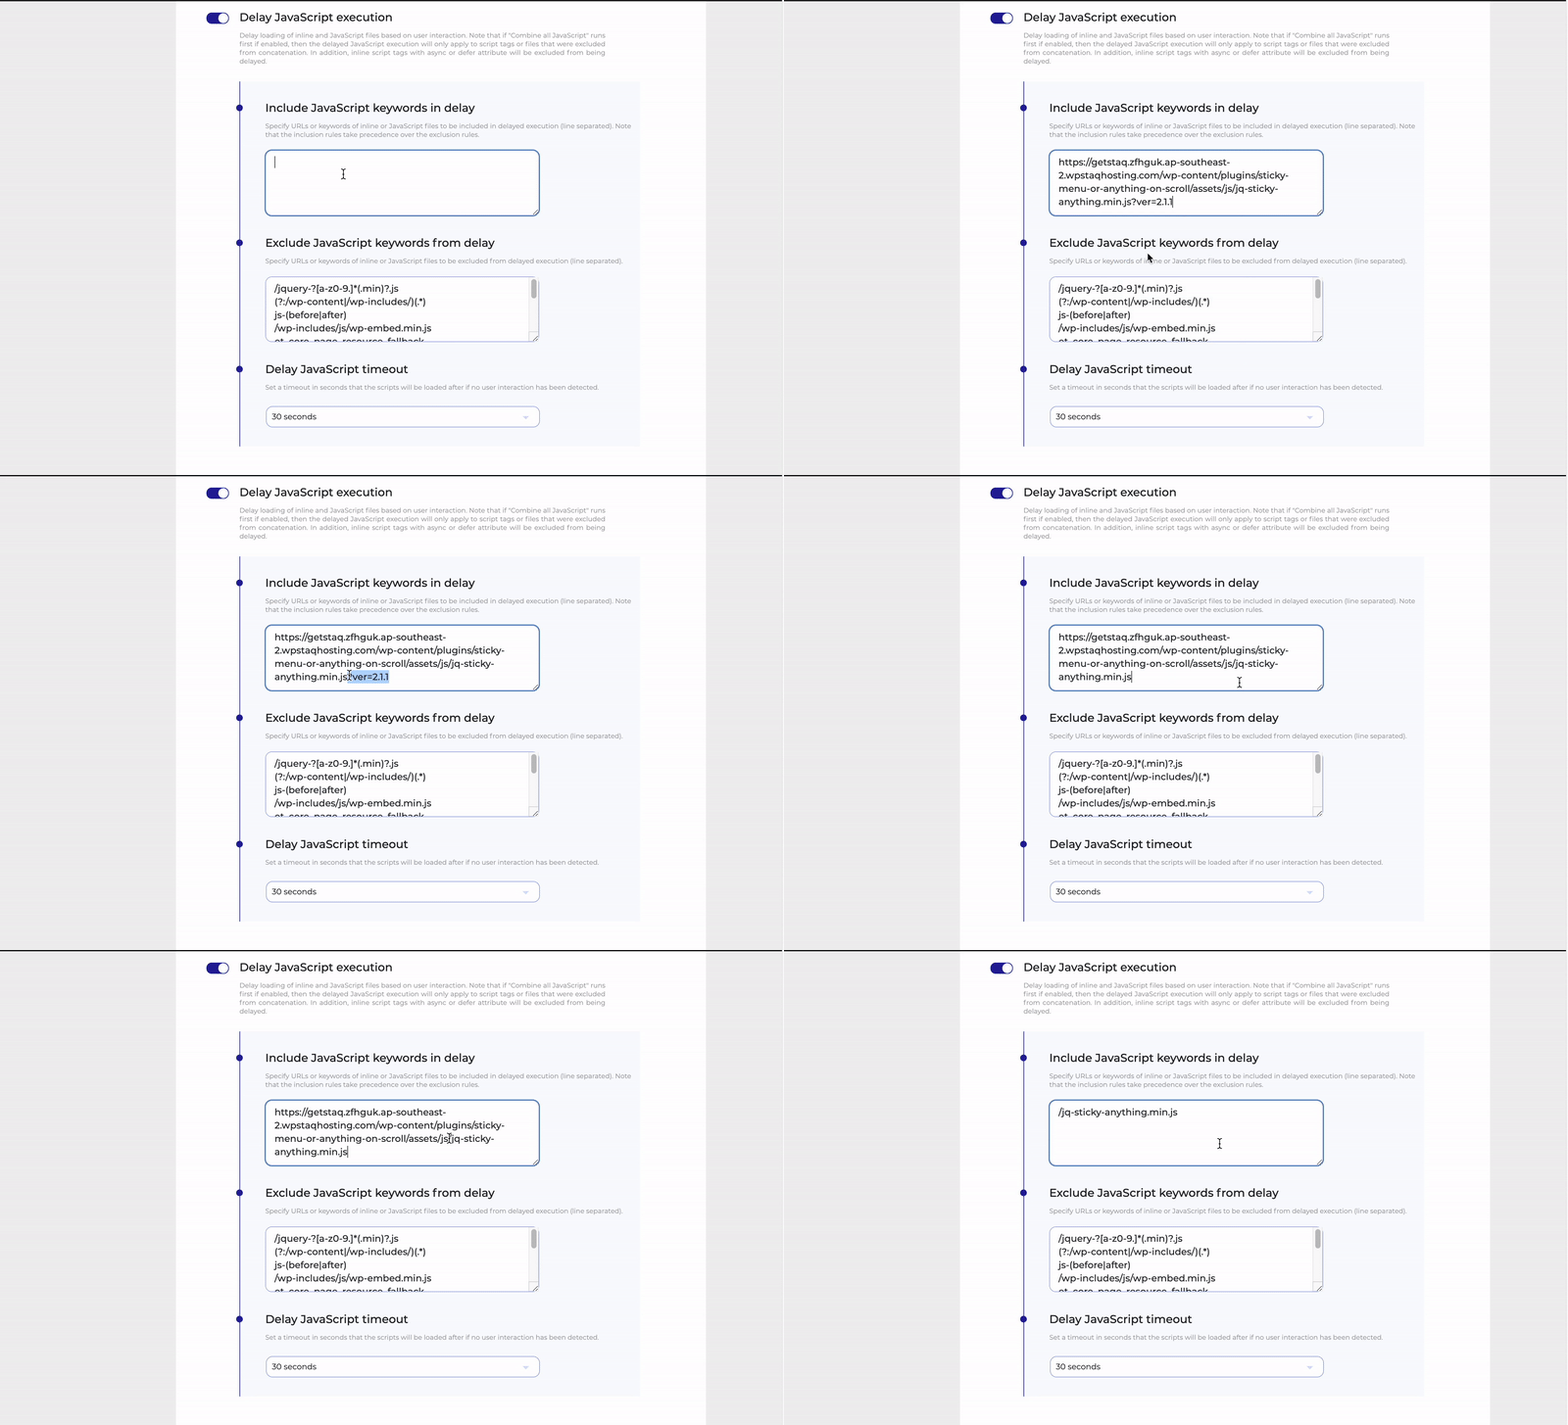
Then, in the backend of WordPress, go to the JavaScript optimization section in Staq Hosting paste the URL and remove the unnecessary information as per the GIF below:
Note, once you're done, go ahead and unblock the blocked file from your browser by right-clicking it.
Diagnosing JavaScript errors in browser
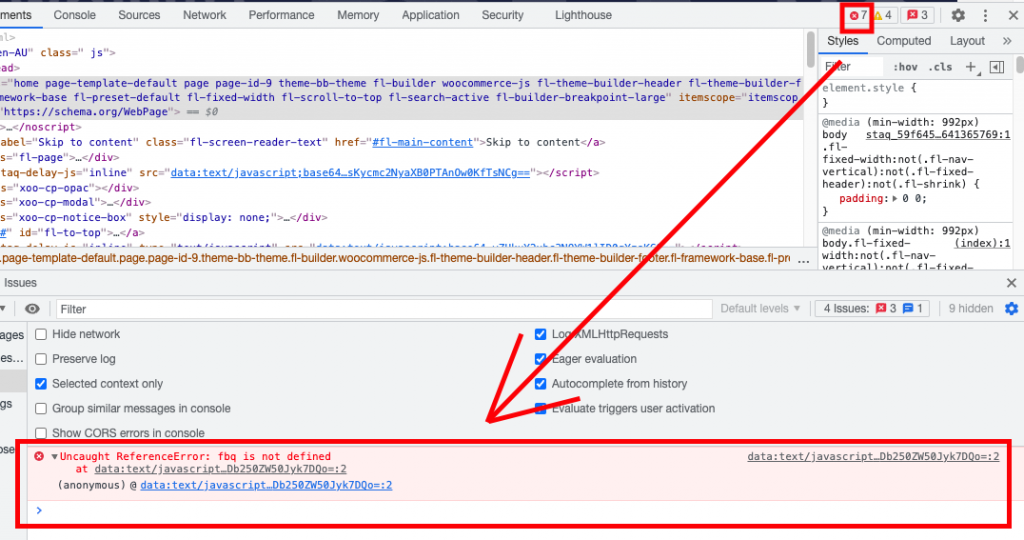
If a certain section of the website is broken, in Inspect (Google Chrome), click on the error icon to investigate what the issue is:
Testing
If you have Staq CDN enabled, to be on the safe side, clear the CDN cache by clicking Staq Hosting on the top admin bar > Clear CDN cache:
Then, refresh the page in Incognito mode to regenerate the cached page.
The next step will be to open the website in Google Chrome Incognito mode and refresh your page so it rebuilds the cached file. Once you've done that, use the same link below.
The moment of truth: go to PageSpeed Insights and assess the newly optimized site.


