Server Redirects


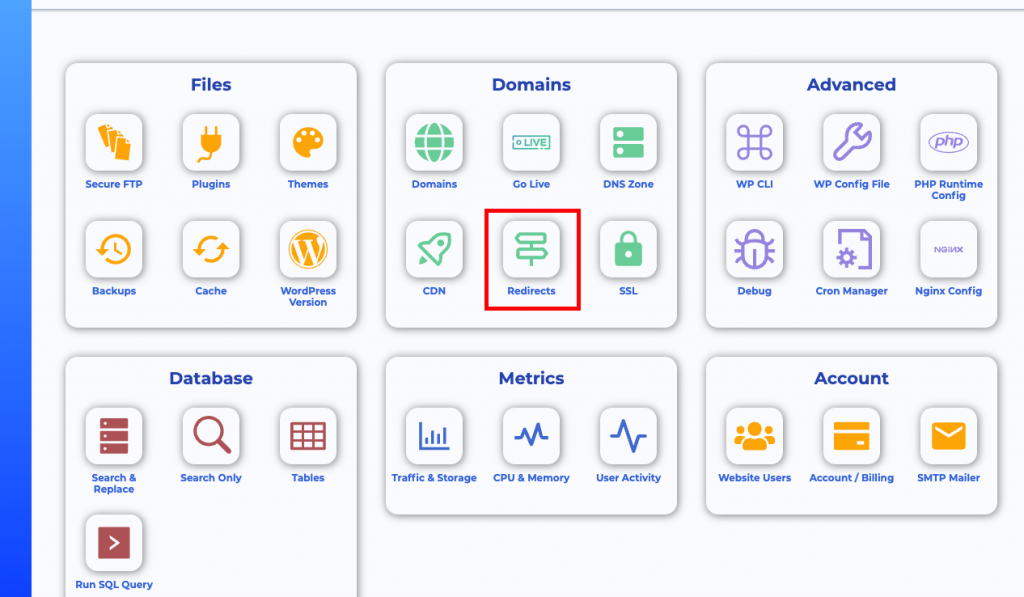
The most efficient way of handling server redirects is using the redirections function found inside Staq Panel.
Not only is it more efficient but it is safer too. Imagine a 301 redirect WordPress plugin being hacked. They would then have full control to direct pages away from your website. That is why we recommend the safer option which is using the redirects tool inside Staq.
It allows you to:
- Export entries via CSV upload
- Import existing entries inside Staq into a CSV file
With the export function, it even supports query strings.
It supports the following types of redirects:
- 301 (moved permanently)
- 302 (previously “moved temporarily”)
- 403 (forbidden)
- 404 (not found)
- 444 (no response)
It’s accessible via Staq Panel:
Internal Page Redirects
You can import your redirects via CSV. You can download a template which appears under the Redirects heading inside the Staq dashboard.
Or, you can click Add and manually add your entries.
Redirecting different domains including internal pages
Say your primary domain name is example.com but you wish to setup the following redirects:
- example.com/payment —> stripe.com/123
- hello.com/about —> example.com/about
- test.com — > example.com (alias)
With Staq Redirects, you can set this exact scenario but you must set up your domain list first.
Setup your Domains first
Firstly, click Domains inside the site’s Staq Panel:
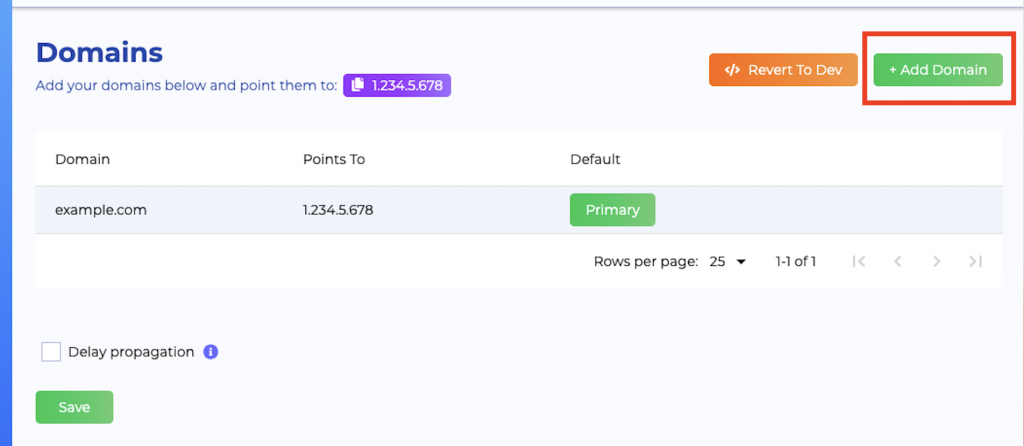
Click +Add Domain:
and fill all the appropriate domain names that you wish to use. The Staq Redirects takes all the domain names here for the Redirects section to work. Please make sure you connect all the A records inside your DNS.
Setting up Redirects
Go back to Redirects page, click +Add and inside the popup modal, you should see the list of domains under Origin Host:
Select the domain in the Origin Host list.
Insert the From URL (remove the root domain), followed by the To URL.
Click Save.


