How to setup SMTP?


Staq allows you to add an SMTP service over your entire Staq account so that all current and future websites will use the SMTP service that you provide in your global settings.
You can then override the global SMTP settings by applying an SMTP service for a particular website.
If you wish to use the SMTP service built into the Staq interface, then you’ll have to useWP Mail SMTP. Download the WP Mail SMTP plugin. This is the free version.
If you wish to use the WP Mail SMTP Pro version instead, you can install it by following this KB.
Otherwise, below is the setup process for the free version of this plugin:
Step 1: Installing WP SMTP Mail as a Global Plugin
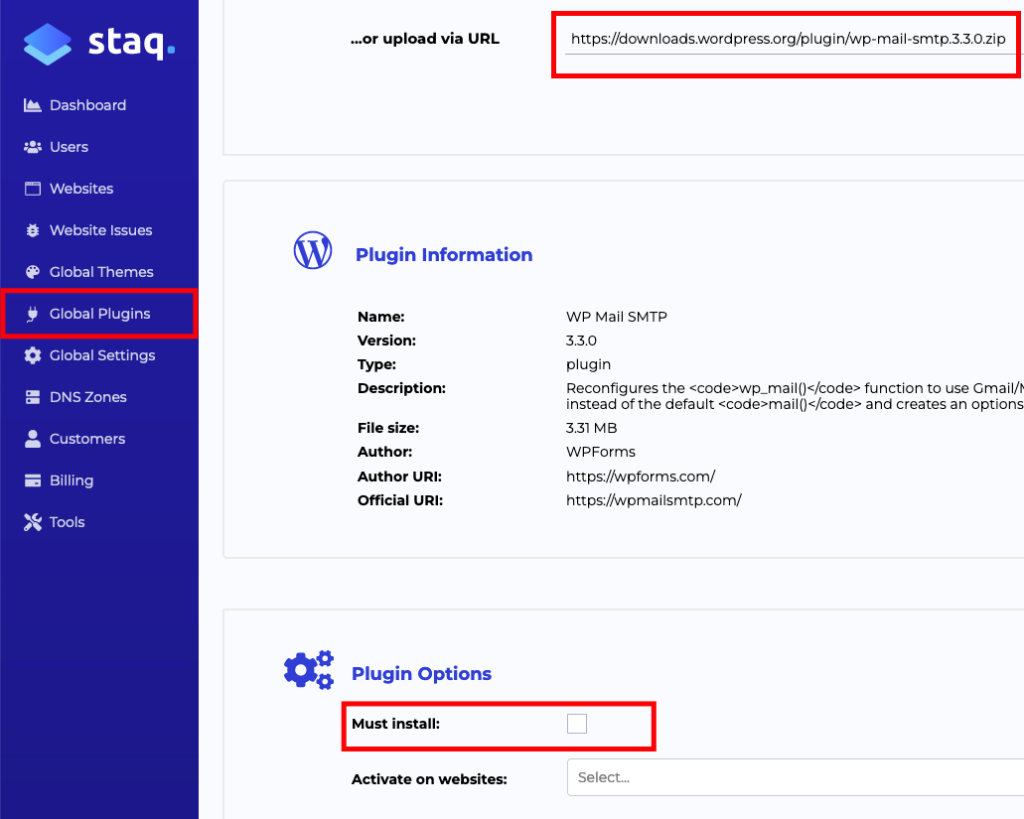
Go to Global Plugins and click Upload Plugin.
Download the WP Mail SMTP and upload it inside Staq. Alternatively, if you have the zip download file for WP Mail SMTP, then insert the URL as per the screenshot below. Select Must Install if you want this plugin to be installed automatically to all current sites and any future sites:
As long as Must Install is selected, all current and future websites will have this plugin automatically installed on the WordPress website.
Step 2 – Configure Global SMTP Settings
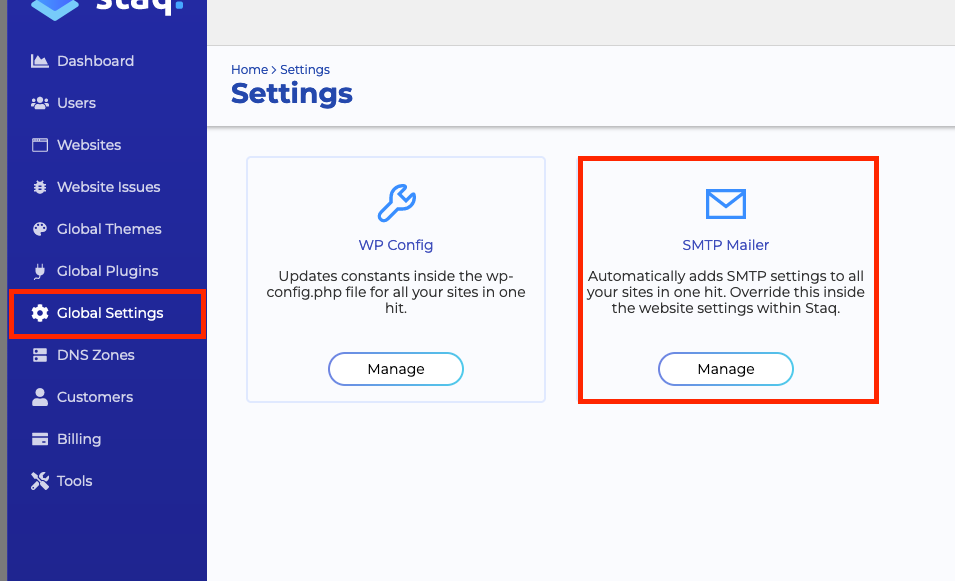
Next, go to Global Settings > SMTP Mailer.
From there, you’ll insert your SMTP host details.
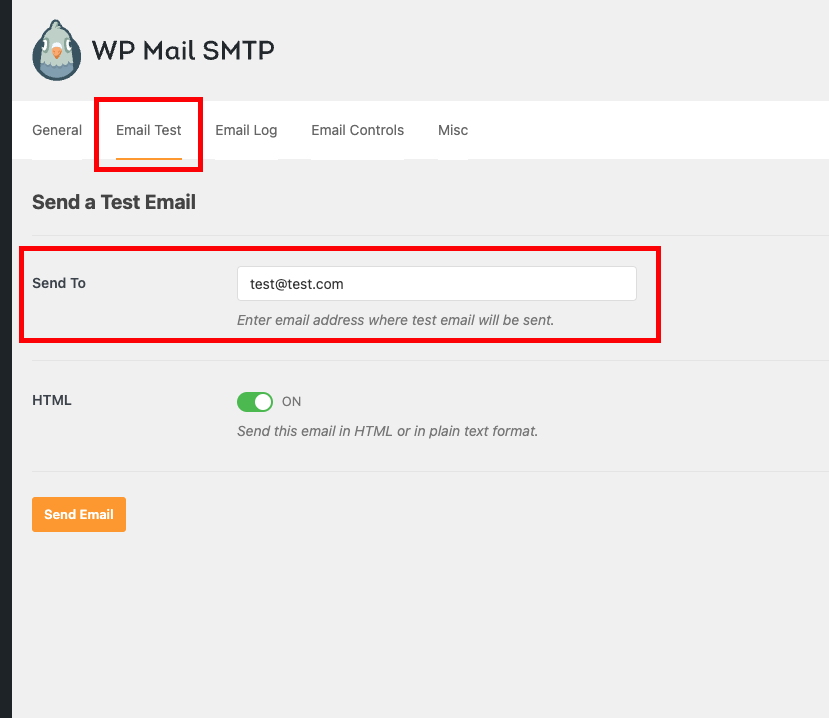
Once completed, log into any WordPress website and go to WP Mail SMTP plugin and send a test email to ensure it works correctly:
Individual Site SMTP Setup: Override Global SMTP Settings
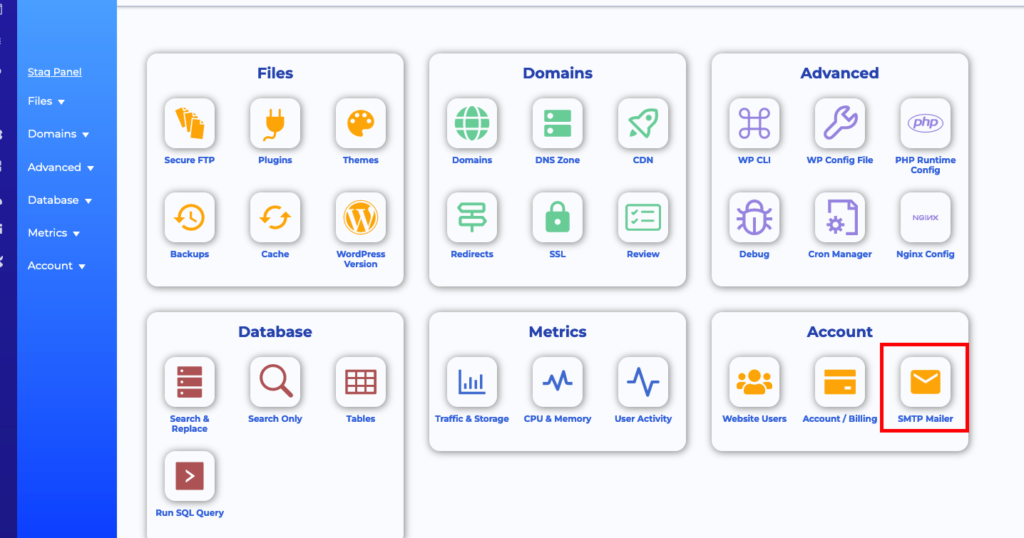
If you wish to use a custom SMTP service for a particular website on Staq, then go to the website in question, and click SMTP:
From there, you’ll be able to enter the details for that website specifically.
Be sure to test the SMTP service to ensure that the service is configured correctly.


