Setup Domain Redirects


How to Add Domains
Adding domains to Staq is a straightforward process. This section will guide you through how to add your domains to the Staq interface before you proceed to set up domain redirects or aliasing.
Adding a New Domain
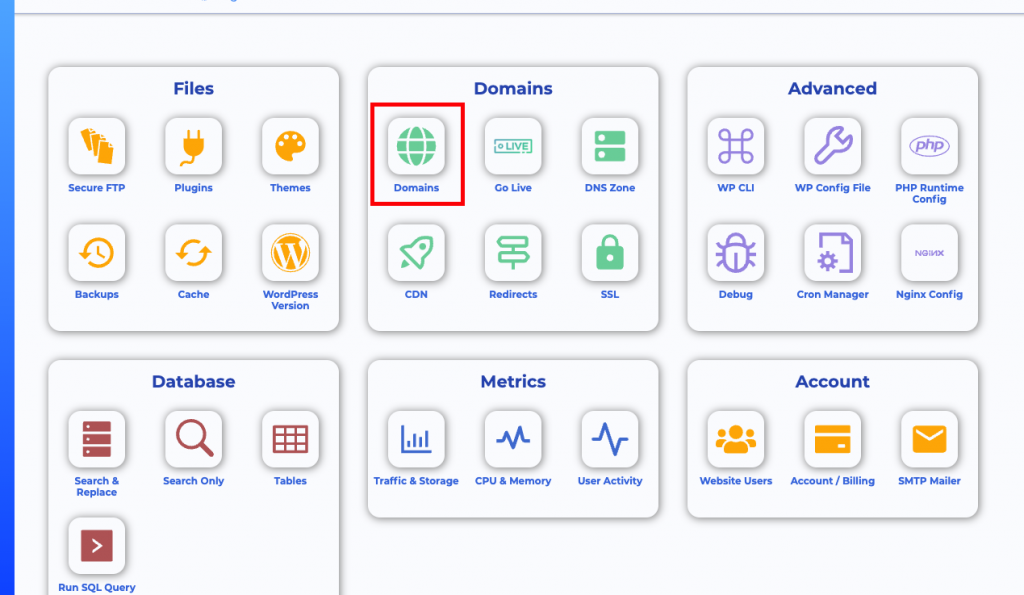
- Navigate to the Staq Panel and select Domains:
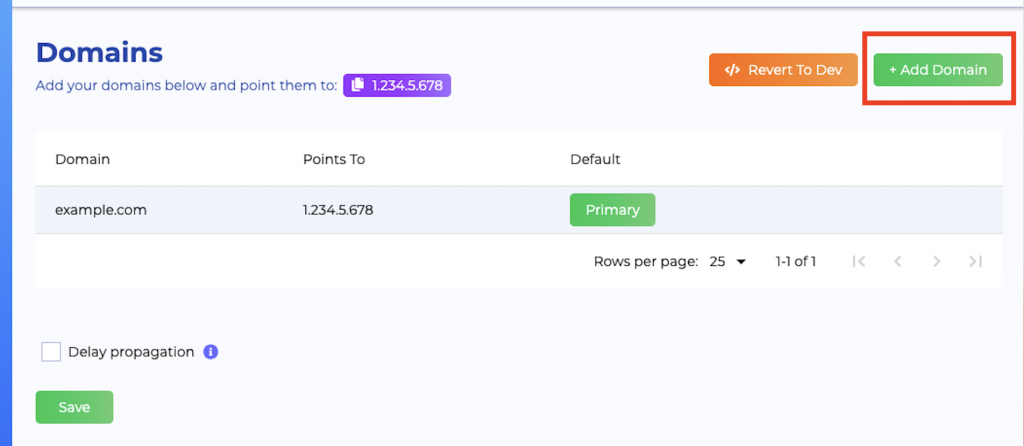
- Click the Add Domain button.
- Enter your domain name in the provided field and hit Submit.
- Your new domain will be listed in the Domains section. You can now configure it further, set up redirects, or proceed to other tasks.
Redirect subpages to another page or domain
If you wish to redirect a particular page:
- to a different domain
- to a different page on the same site
then, this is how you can handle server redirects.
Redirect domain to another domain scenario
This section relates to redirecting other subdomains or other domains to a primary domain. Others may refer to this process of setting an alias domain. Either way, the process to achieve this is below.
For example, you may have:
- www.test.com
- test.com
- lp.test.com
- test.us
- www.test.us
- www.example.com
and you wish to redirect the two links above to the primary domain, example.com.
The process
It is a simple process to redirect domains to a primary domain inside the Staq interface. Please note that this only works for websites that are currently live and not in dev/staging mode.
With the website in question, go to Staq Panel and click Domains:
Step 1
Click Add Domain and fill in the list of domains you wish to redirect to the Primary domain.
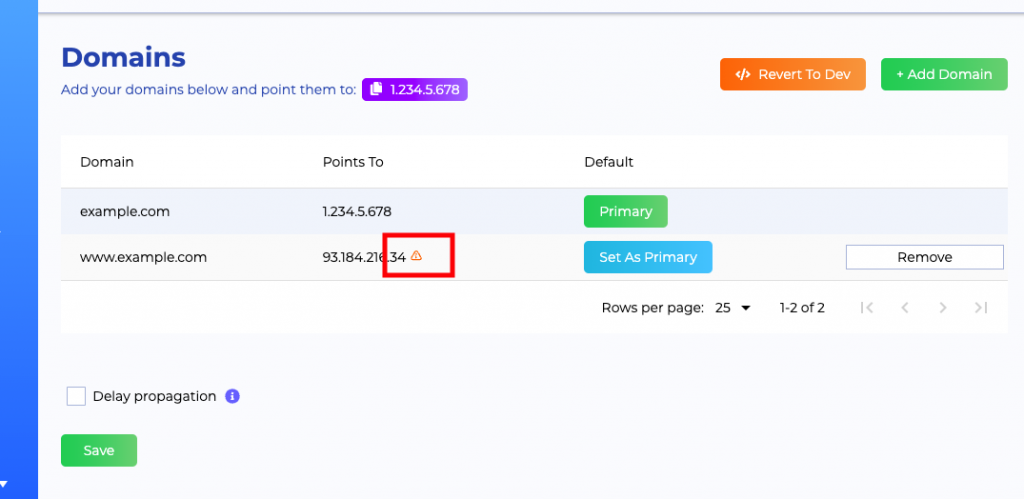
If the below steps have not been taken inside the respective DNS service, then a warning symbol will appear as per the screenshot below. To bypass this, see below to Delay propagation
Step 2
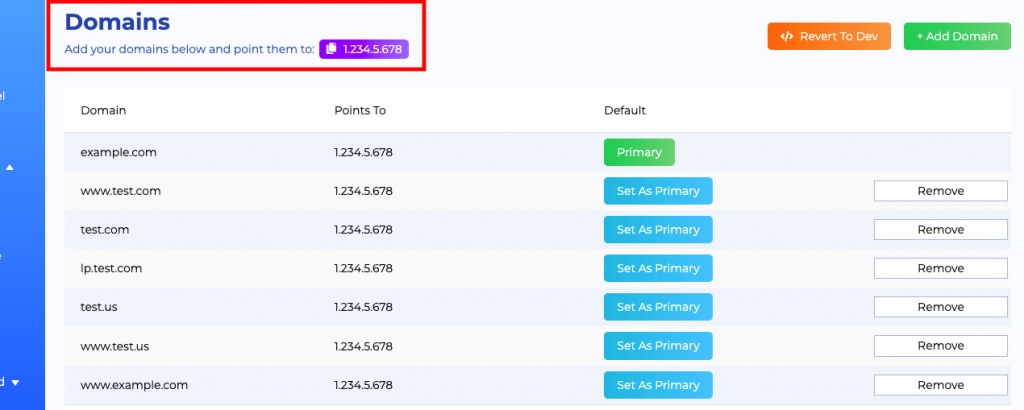
Copy the server IP address:
Step 3
In the above screenshot example, log into the DNS service for each of the following domains:
- example.com
- test.us
- test.com
Step 4
If the domains in the screenshots do not exist, go ahead and create A records in the DNS. For example, go to the DNS of test.com and create:
- A record (with TTL as 300 seconds or 5mins, recommended. Otherwise 1hour is fine)
- www.test.com —> pointing to the server address which is retrievable in Step 1, above
- test.com —> pointing to the server address which is retrievable in Step 1, above
- lp.test.com —> pointing to the server address which is retrievable in Step 1, above
In our example above, repeat the process for:
- example.com
- test.us
Step 5
Click Save.
Delay propagation
Either Staq’s interface has not pinged the correct IP address at that very moment due to DNS propagation or you are waiting for a third-party to make the DNS changes, you can click Delay propagation which will bypass the interface and forcefully save the settings page.
Every few minutes, Staq will ping the domain’s IP address to ensure that it matches the server’s IP address. Once it picks this up, the warning symbol will be removed automatically.


