How to setup Staq Traditional CDN


Setting up and deploying the CDN requires minimal clicks with Staq. The Staq CDN is powered by AWS CloudFront, a leading CDN provider.
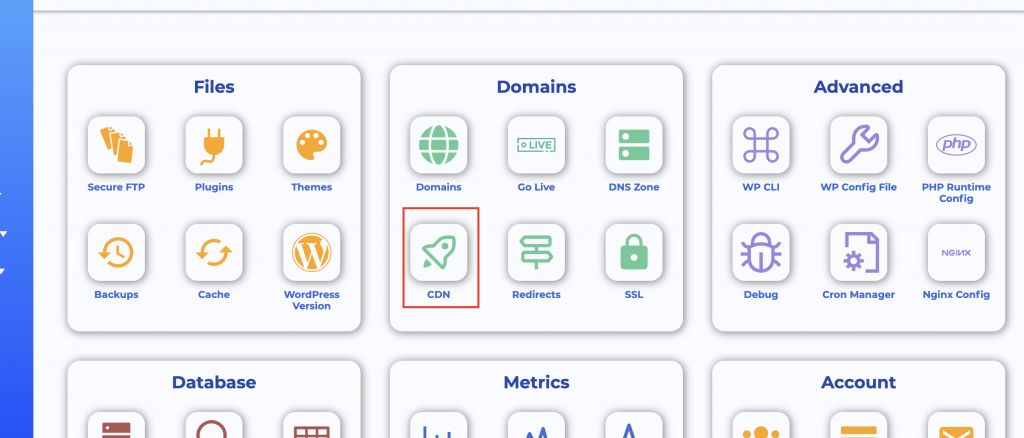
The process is simple. Go to the Staq Panel of the website in question and click CDN:
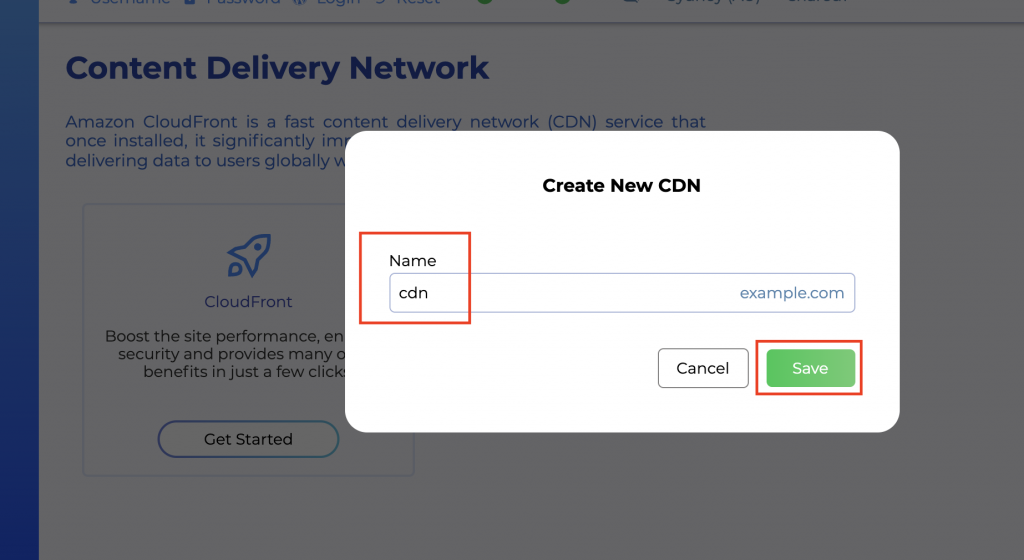
Then, click Get Started.
A popup will then open. By default, it will show cdn but you can amend this to whatever you want. Once considered, click Save:
The steps will differ below based on how your DNS is hosted.
If the website is hosted with Staq DNS, go to heading, Setup A.
If the website uses a third-party DNS, go to heading, Setup B.
Setup A – Using Staq DNS
This section relates to if the website uses Staq DNS as the DNS provider.
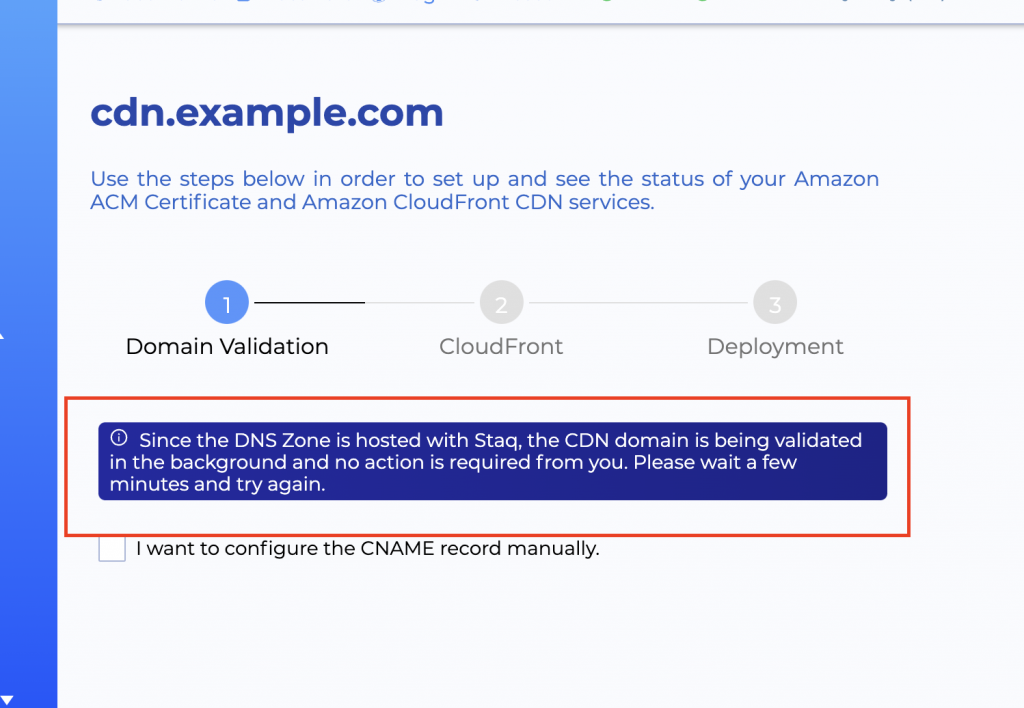
If that is the case, your work is all done. As per the screenshot, since the DNS is hosted with Staq, the CDN will automate the validation and will automatically deploy the CDN on your behalf. Staq will also automatically handle all renewals in the future.
Setup B – Using a third-party DNS
If you’re using a third-party DNS, you’ll need to verify 2x CNAME records inside your DNS to authenticate ownership to the DNS for Staq to deploy the assets to the CDN.
Step 1
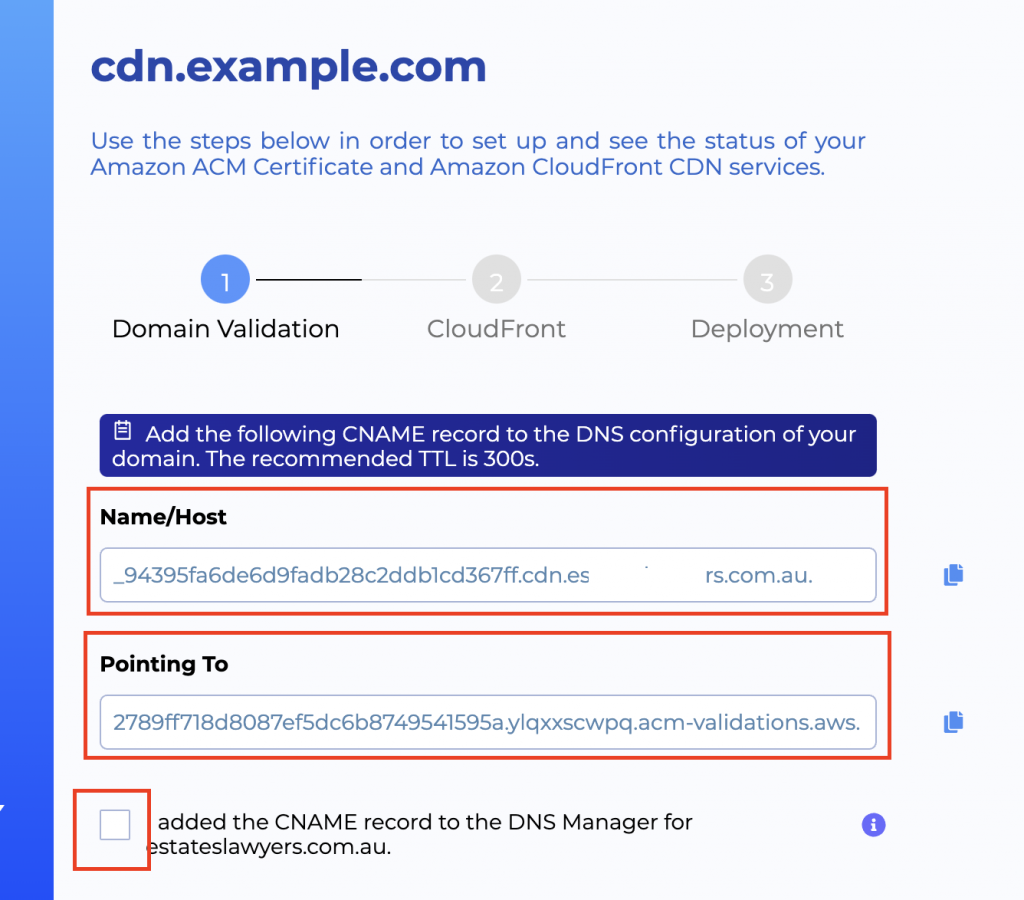
Create the 1st CNAME record by going to your DNS provider and creating a CNAME record.
Set the TTL as 300ms or 5 mins
Copy the Name/Host from Staq and paste it inside your CNAME record.
Repeat the process for the Pointing To section
Once done, click the checkbox to verify that you’ve completed the steps:
It may take up to a few minutes to propagate that particular CNAME record. Once Staq verifies that this particular CNAME has propagated, it will automatically go to the next screen.
Step 2
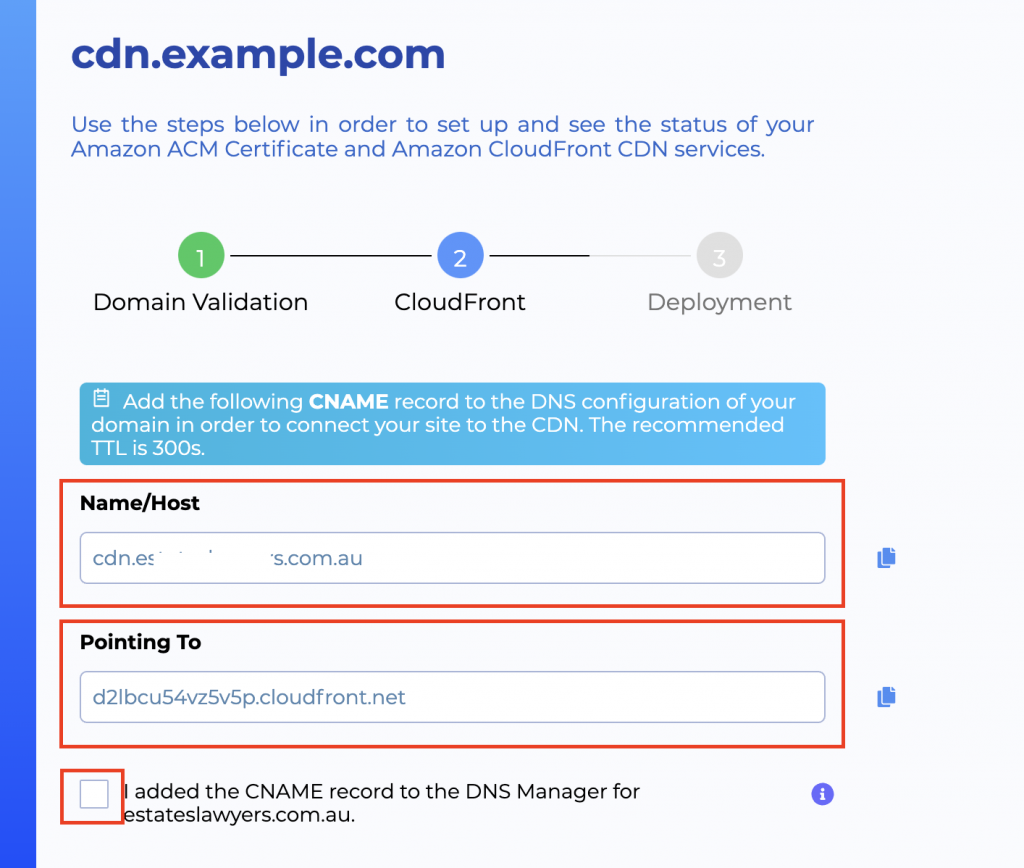
In this screen, you’ll notice that the 2nd records are different and that the warning message is in a lighter blue.
Create the 2nd CNAME record by going to your DNS provider and creating a CNAME record.
Set the TTL as 300ms or 5 mins
Copy the Name/Host from Staq and paste it inside your CNAME record.
Repeat the process for the Pointing To section
Once done, click the checkbox to verify that you’ve completed the steps:
Once that has been completed correctly, Staq will verify the 2nd CDN entry. Once verified and authenticated, it’ll automatically deploy the website’s assets across to the CDN.


