Installing “WP Mail SMTP Pro”
By default, Staq supports the WP Mail SMTP plugin as the only SMTP plugin inside the Staq dashboard.
However, for logging purposes, you may wish to upgrade to the WP Mail SMTP Pro plugin.
Below is how you can implement WP Mail SMTP Pro.
Global Settings
As the name suggests, you can apply a global SMTP setting across all your current and future sites. This means that SMTP details are provided just in case you forget to apply to an individual site as a fallback.
To apply, follow this knowledge base on how to install SMTP for WordPress on Staq.
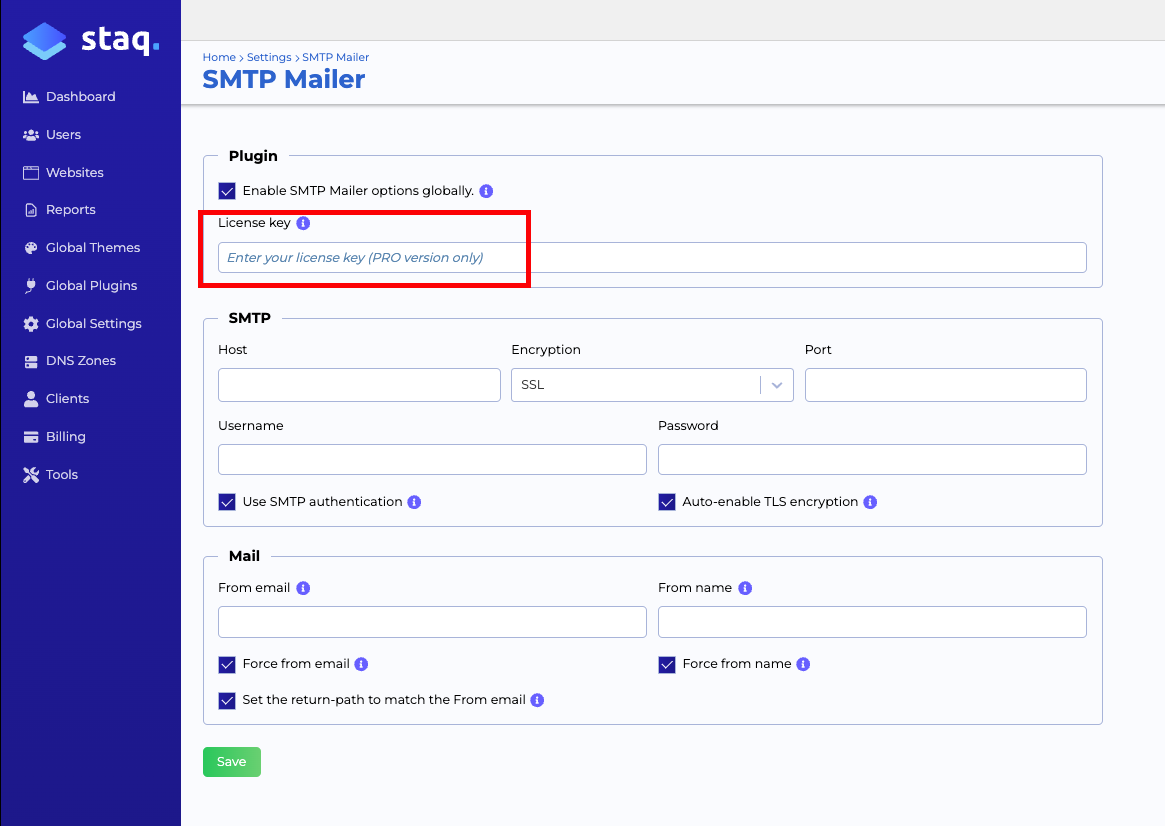
Once completed, you can apply the WP Mail SMTP Pro license here:
Individual Site
If this particular site is using the free version of WP Mail SMTP, go ahead and disable it in favour of the WP Mail SMTP Pro plugin.
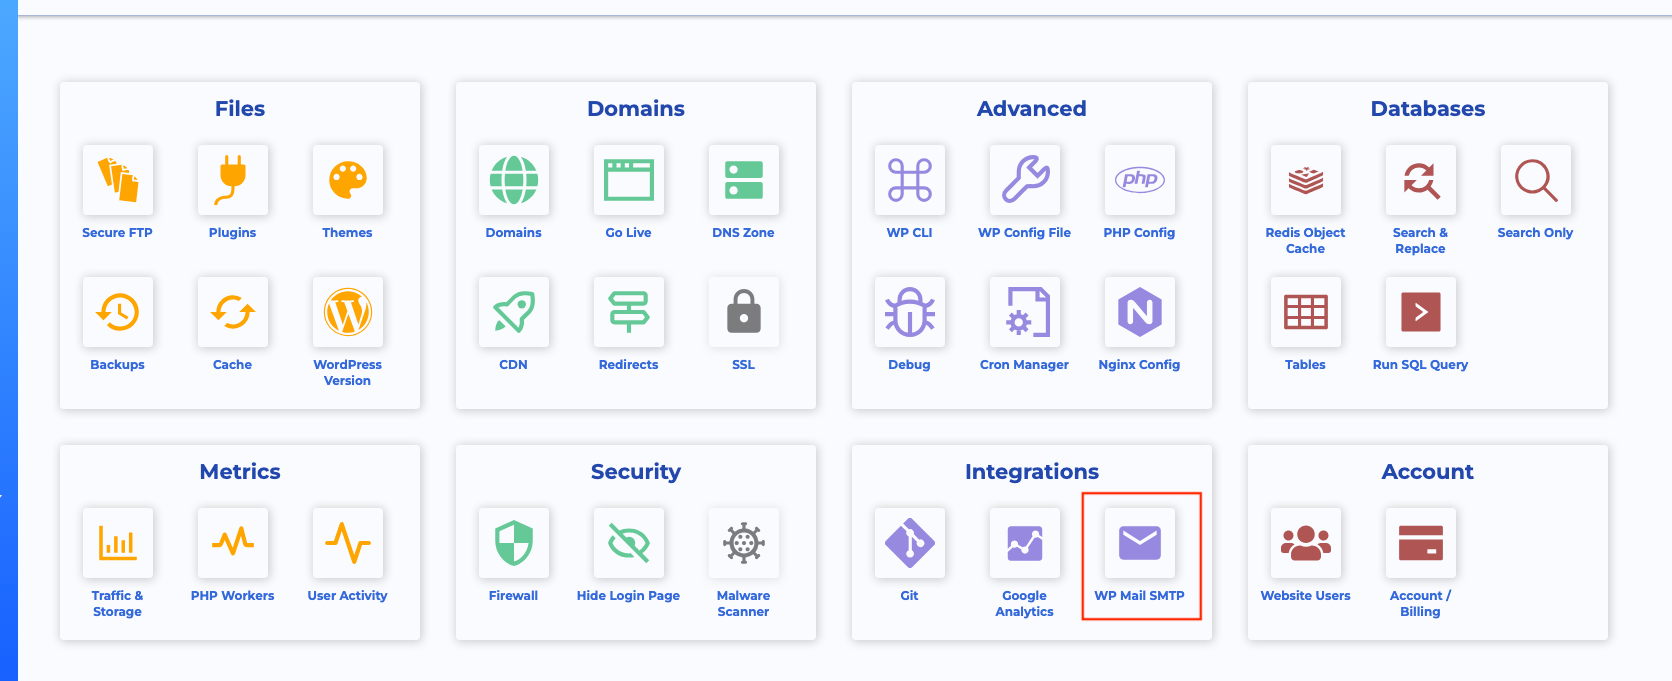
If you need to override your Global Settings and apply WP Mail SMTP Pro to a particular website, you can go to the Staq Panel of the website in question and click WP Mail SMTP:
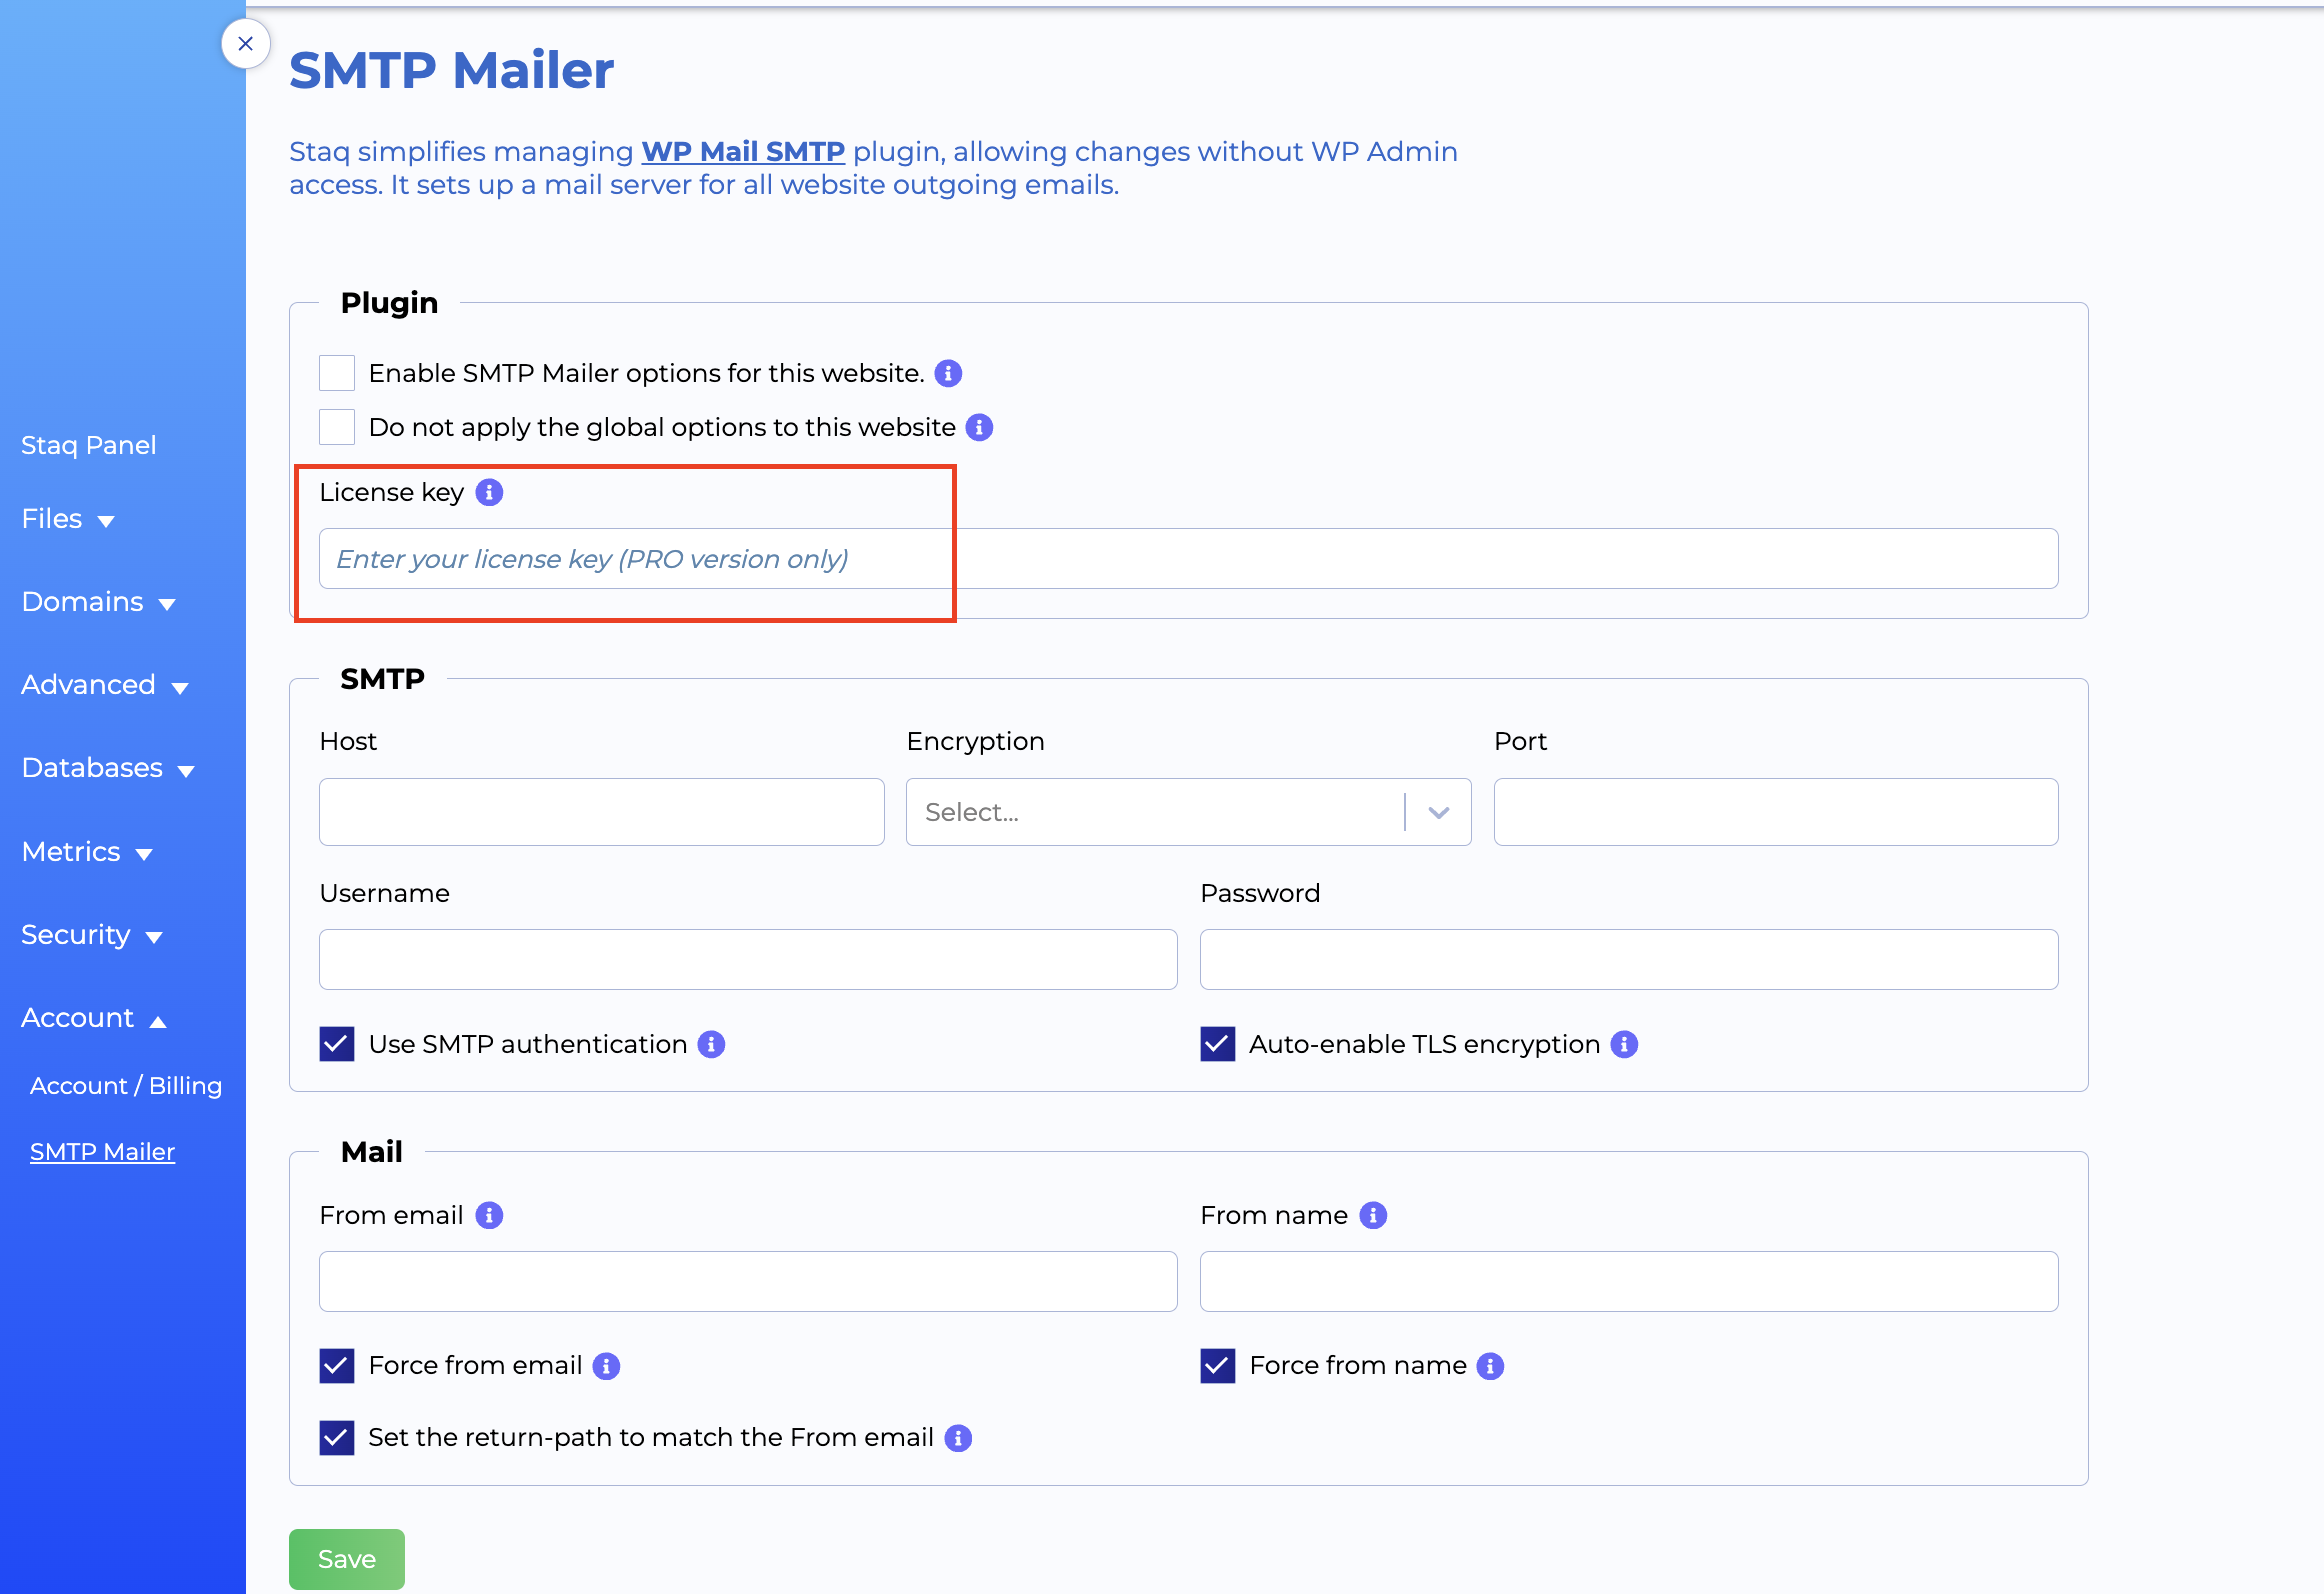
Then, insert your details as per normal, including your WP Mail SMTP Pro license key:
Securing SMTP Settings With Constants
If you wish to create a fallback, you an enable constants inside WordPress by adding your details to the wp-config.php file (please note that as a security feature, you cannot edit the wp-config.php file directly. Please follow the instructions below on how to implement).
Inside the Staq Panel, under Advanced, click WP Config File:
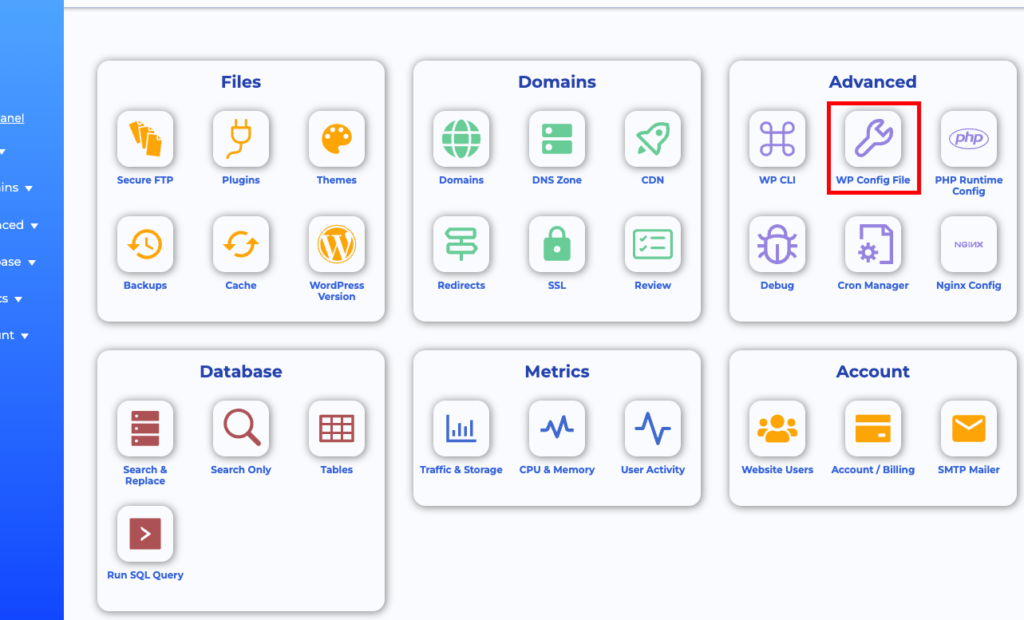
Then, click Add. A popup will open and you can enter each entry one-by-one:
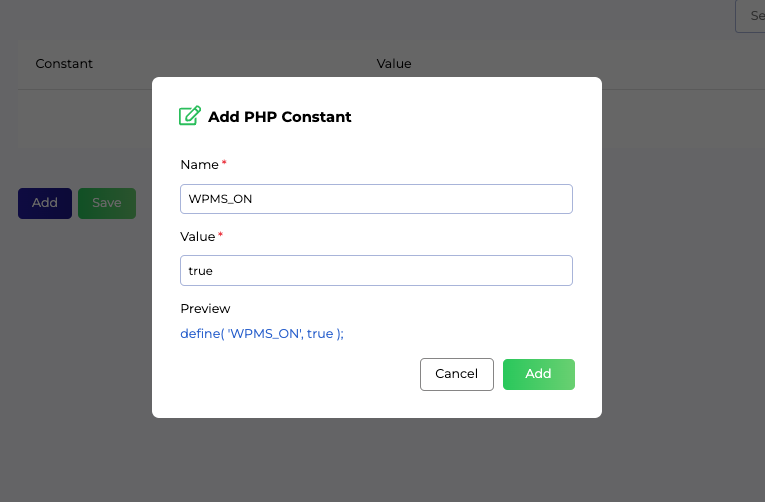
These are the entries to add:
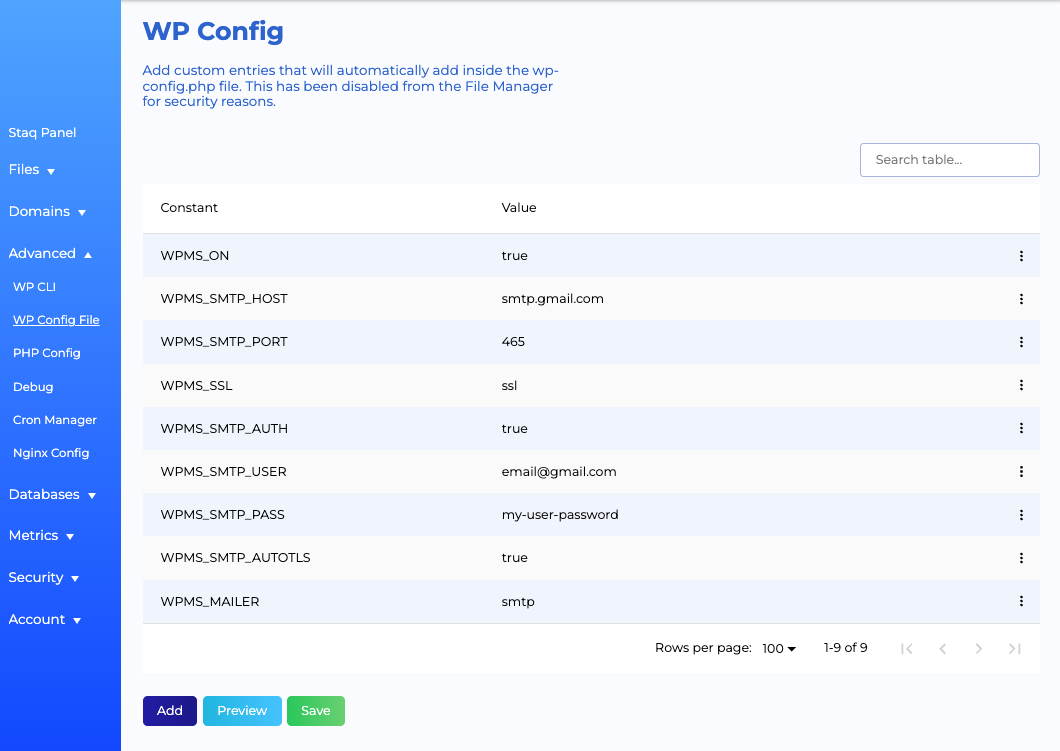
WPMS_ON – true
WPMS_SMTP_HOST – i.e. smtp.gmail.com
WPMS_SMTP_PORT – i.e. 465 or 587
WPMS_SSL – i.e. ssl or tls
WPMS_SMTP_AUTH – true
WPMS_SMTP_USER – username or password
WPMS_SMTP_PASS – password
WPMS_SMTP_AUTOTLS – true
WPMS_MAILER – smtp
An example of the output should look like this:
For more information, you can view the WP Mail SMTP constants.
Need some help?
We all do sometimes. Please reach out to our support team by dropping us a support ticket. We will respond fast.


